
nikon d200 owners manual
Nikon D200 Owners Manual: A Comprehensive Guide
This manual details the Nikon D200’s features, shooting modes, menu navigation, focusing, and advanced techniques. It also covers maintenance, troubleshooting, and the Nikon Manual Viewer 2 application.
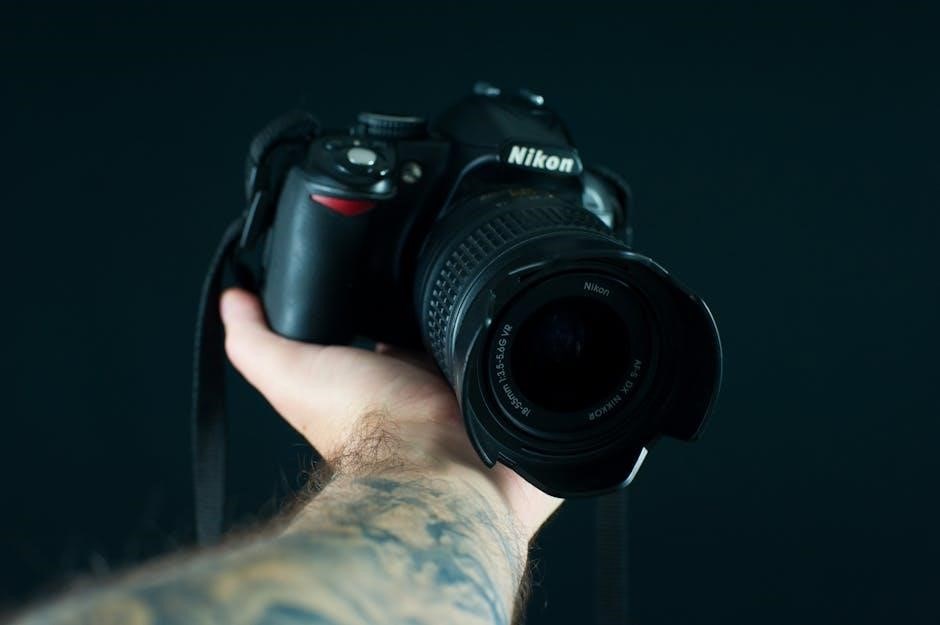
Welcome to the world of the Nikon D200, a professional-grade DSLR camera renowned for its exceptional image quality and robust features. This camera, though released in 2005, remains a capable tool for photographers seeking a balance between performance and affordability.
This manual serves as a comprehensive guide to unlocking the full potential of your D200. We’ll explore everything from initial setup and basic controls to advanced shooting techniques and customization options. Understanding the camera’s menu structure – encompassing Playback, Shooting, Custom Settings, and Setup – is crucial for tailoring it to your specific needs.
Whether you’re a seasoned photographer or new to DSLRs, this resource will help you navigate the D200’s capabilities, ensuring you capture stunning images in various conditions. We’ll also cover essential maintenance and troubleshooting tips, alongside information about the Nikon Manual Viewer 2 application for convenient access to documentation.
Understanding the Camera’s Features
The Nikon D200 boasts a 10.2-megapixel DX-format CCD sensor, delivering high-resolution images with excellent detail. Its advanced 11-area autofocus system ensures sharp focus, even on moving subjects, while the 2.5-inch LCD screen provides clear image review.
Key features include support for both RAW and JPEG image formats, offering flexibility in post-processing. The camera’s extensive menu system allows for deep customization of settings, impacting everything from image quality to camera behavior. Night photography is enhanced by adjustable settings, and the built-in flash offers versatile lighting options.
Furthermore, the D200 is compatible with a wide range of Nikon lenses and accessories, expanding its capabilities. Utilizing the Nikon Manual Viewer 2 application on your smartphone or tablet provides convenient access to the complete owner’s manual for on-the-go reference.

Getting Started with Your Nikon D200
Begin by unboxing, inserting the battery and memory card, and familiarizing yourself with the basic camera controls and buttons for optimal use.
Unboxing and Initial Setup
Upon receiving your Nikon D200, carefully unpack the box and verify all included components are present. These typically include the camera body, a strap, battery, charger, USB cable, and various manuals. Before proceeding, inspect the camera for any physical damage that may have occurred during shipping.
Initial setup involves selecting your preferred language, date, and time settings. The camera will guide you through this process upon first power-on. Ensure you register your camera with Nikon to benefit from warranty support and potential firmware updates. Familiarize yourself with the included documentation, particularly the comprehensive owner’s manual, for detailed instructions and troubleshooting tips. Properly installing the supplied software can also enhance your experience.
Inserting the Battery and Memory Card
To begin, locate the battery compartment on the bottom of the Nikon D200. Unlock the latch and insert the supplied battery, ensuring correct polarity as indicated by the diagram inside the compartment. Securely close the latch to prevent accidental dislodgement. Next, find the memory card slot, typically located on the side of the camera.
The D200 supports CompactFlash (CF) cards. Gently insert a CF card into the slot until it clicks into place. Avoid forcing the card. To remove either the battery or memory card, ensure the camera is powered off and use the release mechanism. Proper insertion and removal prevent damage to the camera and data loss.
Basic Camera Controls and Buttons
The Nikon D200 features a comprehensive array of controls for precise operation. The main dial controls shooting modes – Auto, Program, Aperture Priority, Shutter Priority, and Manual. The command dial adjusts settings within these modes, like aperture or shutter speed; The AF-ON button initiates autofocus, while the AE-L/AF-L button locks exposure or focus.
The multi-selector navigates menus and selects focus points. The ‘i’ button provides quick access to frequently used settings; Familiarize yourself with the function buttons, customizable for personalized control. Understanding these basic controls is crucial for efficient operation and unlocking the D200’s full potential.

Shooting Modes and Settings
Explore Auto, Manual, Aperture Priority, Shutter Priority, and Program modes for diverse shooting scenarios. Customize settings for optimal image control and creative expression.
Auto Mode vs. Manual Mode
Auto Mode simplifies photography by letting the camera determine optimal settings – aperture, shutter speed, ISO, and white balance – for the scene. It’s ideal for beginners or quick snapshots where precise control isn’t crucial. However, it limits creative input.
Manual Mode grants full control over every camera setting. This empowers experienced photographers to achieve specific artistic visions, particularly in challenging lighting conditions. You independently adjust aperture for depth of field, shutter speed for motion blur or freezing action, and ISO for sensitivity.
Understanding the interplay between these settings is key to mastering Manual Mode. While demanding, it unlocks the D200’s full potential, allowing for nuanced and personalized image creation beyond the capabilities of automated modes. Experimentation is encouraged!

Aperture Priority Mode (A)
Aperture Priority (A) mode allows you to select the desired aperture (f-stop), controlling the depth of field in your images. The camera automatically calculates the appropriate shutter speed for correct exposure. A wider aperture (lower f-number, like f/2.8) creates a shallow depth of field, blurring the background – perfect for portraits.
Conversely, a narrower aperture (higher f-number, like f/16) yields a greater depth of field, keeping more of the scene in focus – ideal for landscapes. This mode balances creative control with convenience, letting you prioritize depth of field while the camera handles exposure.
It’s a fantastic stepping stone from Auto mode, fostering understanding of the exposure triangle without full manual control. Remember to monitor the shutter speed to avoid motion blur.
Shutter Priority Mode (S)
Shutter Priority (S) mode empowers you to dictate the shutter speed, controlling how motion is captured in your photographs. The camera automatically adjusts the aperture to achieve proper exposure. Faster shutter speeds (e.g., 1/1000s) freeze motion, perfect for sports or wildlife photography. Slower shutter speeds (e.g., 1/30s) blur motion, conveying a sense of movement or creating light trails.
This mode is invaluable when a specific shutter speed is crucial for your artistic vision or to avoid unwanted blur. Be mindful of the aperture value the camera selects; a very wide aperture might result in a shallow depth of field.
Shutter Priority offers a balance between control and automation, allowing you to master motion while the camera manages aperture.
Program Mode (P)
Program (P) mode represents a versatile semi-automatic shooting option on the Nikon D200. The camera automatically selects both the aperture and shutter speed to achieve a well-exposed image, offering a convenient starting point for various shooting scenarios. However, unlike full Auto mode, Program mode allows for user intervention.
You can adjust exposure compensation to brighten or darken the image, and Program Shift enables you to cycle through equivalent aperture and shutter speed combinations while maintaining the same exposure. This provides creative control without fully manual settings.
Program mode is ideal for everyday photography where quick results and a degree of control are desired.
Custom Shooting Modes
The Nikon D200 offers custom shooting modes, allowing photographers to save and recall personalized camera settings for specific shooting conditions. These modes, accessible via the mode dial, streamline workflow and ensure consistent results. Users can store preferred combinations of aperture, shutter speed, ISO, white balance, and other settings.
To create a custom setting, configure the camera as desired, then enter the Custom Settings menu and assign the current setup to one of the available custom modes (usually labeled U1, U2, or U3). This is incredibly useful for frequently used setups like landscape, portrait, or sports photography.
Custom modes enhance efficiency and creative control.

Navigating the Menu System
The D200’s menu system is structured into Playback, Shooting, Custom Settings, and Setup menus, offering extensive camera customization and control options.
Understanding the Menu Structure
The Nikon D200’s menu system is logically organized to facilitate efficient camera setup and customization. It’s divided into four primary sections: Playback, Shooting, Custom Settings, and Setup. The Playback menu handles image review and deletion options. The Shooting menu controls core camera settings like image quality, ISO, and autofocus.
Custom Settings allows for personalized button assignments and camera behavior, offering a high degree of control. Finally, the Setup menu manages general camera settings, display options, and system information. Within each menu, options are further categorized for easy navigation. You can adjust settings on the information screen, and even change the menu language to suit your preference. Understanding this structure is key to unlocking the D200’s full potential.
Playback Menu Options
The Playback menu on the Nikon D200 provides tools for reviewing and managing your captured images. Key options include displaying images individually or in multi-image views, zooming for detailed inspection, and rotating images for correct orientation. You can also protect images from accidental deletion and tag them for later categorization.
Histogram display is available for assessing exposure accuracy, while highlight alert identifies overexposed areas. The menu allows for deleting single or multiple images, and resetting the card. Furthermore, you can view shooting data like aperture, shutter speed, and ISO settings alongside each image. These options streamline your workflow, enabling efficient image selection and organization directly on the camera.
Shooting Menu Options
The Shooting menu on the Nikon D200 controls core camera settings for image capture. This includes selecting image quality (RAW or JPEG), choosing the desired image size and compression level, and configuring the autofocus settings. Users can adjust the metering mode to optimize exposure based on the scene, and set white balance for accurate color rendition.
ISO sensitivity, flash control, and active D-lighting are also managed here. The menu allows for bracketing exposure, setting self-timer options, and customizing the autofocus area mode. These settings directly impact the final image, offering extensive control over the creative process. Understanding these options is crucial for achieving desired photographic results with the D200.
Custom Settings Menu Options
The Custom Settings menu of the Nikon D200 allows for personalized camera operation. This section enables users to tailor button assignments, control display settings, and fine-tune the autofocus system to their preferences. Options include customizing the function of the depth-of-field preview button and adjusting the behavior of the shutter release.
Users can configure the information displayed in the viewfinder and on the LCD screen, as well as set up custom picture controls for specific shooting conditions. This menu also controls settings related to file naming, time zone, and language. By utilizing these options, photographers can optimize the D200’s interface for a more efficient and intuitive workflow.
Setup Menu Options
The Setup menu on the Nikon D200 handles fundamental camera configurations. This includes options for setting the date, time, and world time, crucial for accurate image metadata. Users can also adjust the display settings, such as brightness and LCD color balance, for optimal viewing in various lighting conditions.
Further options within this menu allow for customizing the button layout, selecting the language displayed on the camera’s interface, and managing file naming conventions. Importantly, the Setup menu also provides access to firmware version information and options for resetting the camera to its factory default settings. These settings ensure the D200 operates according to individual preferences and maintains optimal performance.

Focusing and Exposure

Master autofocus modes, exposure compensation, metering, and white balance for perfectly captured images. These settings are vital for photographic control.
Autofocus Modes and Settings
The Nikon D200 offers a variety of autofocus (AF) modes to suit different shooting scenarios. Single-servo AF (AF-S) is ideal for stationary subjects, focusing once when the shutter button is half-pressed. Continuous-servo AF (AF-C) tracks moving subjects, continuously adjusting focus as they move – perfect for sports or wildlife photography. Automatic-servo AF (AF-A) automatically switches between AF-S and AF-C, attempting to determine the best mode for the situation.
AF-area mode selection is crucial. Single-area AF allows you to choose a specific focus point. Dynamic-area AF uses multiple focus points around your selected point, useful for tracking moving subjects. Auto-area AF lets the camera automatically select focus points, but can sometimes be inaccurate. Understanding these modes and customizing AF settings within the Custom Settings menu will significantly improve your focusing accuracy and overall image quality.
Exposure Compensation
Exposure compensation allows you to override the camera’s automatically determined exposure, brightening or darkening images as needed. This is particularly useful in challenging lighting situations where the camera’s meter might be fooled, such as scenes with predominantly bright or dark tones. The Nikon D200’s exposure compensation scale typically ranges from -5 to +5 stops, offering precise control.
To use exposure compensation, access it through the camera’s quick menu or directly via a dedicated dial (if equipped). Positive values brighten the image, while negative values darken it. Regularly checking your histogram during shooting is recommended to ensure proper exposure. Mastering exposure compensation is key to achieving consistently well-exposed photographs, especially when shooting in aperture or shutter priority modes.
Metering Modes Explained
The Nikon D200 offers several metering modes to assess scene brightness and determine optimal exposure settings. Matrix metering evaluates the entire frame, ideal for general scenes. Center-weighted metering prioritizes the center of the frame, useful for portraits where the subject is centrally located. Spot metering measures light from a very small area, perfect for challenging lighting or specific subject details.
Understanding each mode is crucial for accurate exposure. Matrix metering works well in most situations, but can be misled by strong backlighting. Center-weighted is a good compromise, while spot metering demands precise aiming. Experimenting with different modes allows you to achieve the desired results based on the specific scene and your creative vision. Proper metering ensures well-exposed and detailed images.
White Balance Adjustment
Accurate white balance ensures colors are rendered naturally in your photographs. The Nikon D200 provides several preset options, including Auto, Incandescent, Fluorescent, Direct Sunlight, Flash, Cloudy, and Shade. Auto White Balance (AWB) attempts to determine the correct balance automatically, suitable for many situations. However, for precise control, selecting a preset matching the light source is recommended.
Custom White Balance allows you to manually set the balance using a gray card or white object. This is ideal for challenging lighting conditions where presets may not be accurate. Fine-tuning the white balance in post-processing is also possible, but achieving it correctly in-camera yields the best results. Proper white balance creates visually appealing and realistic images.

Advanced Features and Techniques
Explore RAW vs. JPEG, night photography settings, effective flash usage, and extensive camera customization options to unlock the D200’s full potential.
RAW vs. JPEG Image Formats
Choosing between RAW and JPEG is fundamental to your workflow. JPEG files are compressed, meaning some image data is discarded to reduce file size, offering convenience for immediate use and sharing. However, this compression is lossy, impacting potential editing flexibility.
RAW files, conversely, contain virtually all image data captured by the sensor. This results in larger file sizes but provides significantly greater latitude for post-processing adjustments – exposure, white balance, and detail recovery – without substantial quality degradation.
With RAW, you have a digital negative, allowing non-destructive editing. JPEG is best for quick results, while RAW is ideal for serious photographers seeking maximum control and quality. Consider your editing needs and storage capacity when making your selection.
Night Photography Settings
Capturing stunning night scenes with your Nikon D200 requires specific settings. Begin by setting the camera quality to RAW for maximum editing flexibility. Utilize the native ISO setting – typically ISO 100 – to minimize noise, though increasing it may be necessary in very low light.
Employ a sturdy tripod to prevent blur during long exposures. Aperture selection depends on desired depth of field; wider apertures (lower f-numbers) gather more light but reduce sharpness. Shutter speed will be your primary control for exposure, often requiring several seconds or even minutes.
Manual focus is often preferred for precise sharpness. Consider using exposure compensation to fine-tune brightness. Experiment with white balance settings to achieve accurate colors or creative effects.
Using Flash Effectively
The Nikon D200’s built-in flash and compatibility with external units offer versatile lighting options. For direct flash, consider using a diffuser to soften the light and reduce harsh shadows. Explore flash modes like TTL (Through-The-Lens) for automatic exposure or manual mode for precise control.
Rear-curtain sync can create dramatic light trails behind moving subjects. Utilize flash compensation to adjust the flash output, brightening or darkening the scene as needed. Bounce flash off ceilings or walls for a more natural, diffused light source.
When using external flashes, explore advanced techniques like off-camera flash and high-speed sync for creative control. Remember to balance flash power with ambient light for optimal results.
Customizing Camera Settings
The Nikon D200 allows extensive customization through its Custom Settings menu. Personalize button assignments for quicker access to frequently used functions, streamlining your workflow. Adjust the information display to show relevant shooting data in the viewfinder or on the LCD screen.
Fine-tune autofocus settings to match your shooting style and subject matter. Customize image quality settings, choosing between RAW and JPEG formats, and adjusting compression levels. Configure the metering system to prioritize specific areas of the scene.
Save custom shooting presets for different scenarios, ensuring consistent results. Explore options for file naming and folder organization to simplify image management.
Maintenance and Troubleshooting
Proper cleaning, addressing common issues, updating firmware, and utilizing the Nikon Manual Viewer 2 application will ensure optimal D200 performance and longevity.
Cleaning Your Nikon D200
Maintaining your Nikon D200’s pristine condition is crucial for optimal performance. Regularly use a blower to remove dust from the sensor and viewfinder. For stubborn dust, employ a dedicated sensor cleaning kit, following the instructions carefully to avoid damage.
The camera body should be wiped with a soft, dry cloth. Avoid using liquid cleaners, as they can damage the finish. The lens benefits from occasional cleaning with lens paper and a lens cleaning solution. Gently wipe in a circular motion.
Pay attention to the contacts on the battery and memory card compartments; a dry cloth is sufficient here. Inspect the LCD screen for smudges and clean with a microfiber cloth. Always power off the camera before cleaning.
Common Problems and Solutions
Encountering issues with your Nikon D200 is normal; here are some common fixes. If the camera won’t power on, ensure the battery is fully charged and correctly inserted. For memory card errors, try reformatting the card in the camera (back up data first!).
If autofocus isn’t working, check the autofocus settings and ensure the lens is properly attached. Blurry images often indicate incorrect focusing or a dirty lens. Exposure problems can be resolved by adjusting exposure compensation or metering mode.
If the menu system freezes, try resetting the camera to factory defaults. For persistent issues, consult the Nikon support website or a qualified technician. Firmware updates, available through Nikon, often address known bugs and improve performance.
Firmware Updates
Keeping your Nikon D200’s firmware updated is crucial for optimal performance and bug fixes. Nikon periodically releases firmware updates to enhance camera functionality and address potential issues. These updates can improve autofocus accuracy, image quality, and overall system stability.
To update the firmware, download the latest version from the Nikon support website. You’ll need a formatted memory card to transfer the update file. Carefully follow the on-screen instructions during the update process – do not interrupt the process or turn off the camera.
Always read the release notes accompanying the firmware update to understand the changes and improvements included. Regularly checking for updates ensures your D200 benefits from the latest advancements and maintains peak operational condition.
Nikon Manual Viewer 2 Application
The Nikon Manual Viewer 2 application provides convenient access to your Nikon D200’s owner’s manual directly on your smartphone or tablet. This digital version eliminates the need to carry the physical manual, offering portability and quick reference in the field.
Install the application from your device’s app store and download the D200 manual within the app. You can then easily browse the manual’s contents, search for specific topics, and learn about your camera’s features on the go.
This application ensures you always have essential information at your fingertips, aiding in understanding complex settings and troubleshooting potential issues. It’s a valuable tool for both novice and experienced Nikon D200 users.