
instruction manual for orbit timers
Orbit timers, detailed in numerous user manuals, offer simplified sprinkler system control. Models like 96874 and 57894-27896 utilize Easy-Set Logic for convenient programming.
What are Orbit Timers?
Orbit Timers are automated devices designed to manage and regulate your irrigation system, eliminating the need for manual sprinkler operation. As detailed in Orbit’s sprinkler timer user manuals, these timers connect to your existing sprinkler valves, allowing you to schedule watering times and durations with precision.
They come in various models, including those utilizing Easy-Set Logic technology (like models 96874, 96876, and 96954), offering user-friendly interfaces. These timers aren’t just simple on/off switches; they provide features like multiple program options, zone control, and even manual watering overrides. Understanding the specific functions of your Orbit timer, as outlined in its manual, is key to efficient water management and a healthy landscape.
Benefits of Using an Orbit Timer
Employing an Orbit Timer, as explained in the official instruction manuals, delivers substantial advantages for homeowners. Primarily, it conserves water by allowing precise scheduling, preventing overwatering and reducing waste. This leads to lower water bills and a more environmentally conscious approach to lawn care.
Furthermore, Orbit timers offer convenience; you can automate your watering schedule and avoid the daily task of manually turning sprinklers on and off. Features like rain delay, detailed in user guides, protect your landscape during inclement weather. The ability to set different run times for each zone ensures tailored watering for varying plant needs, promoting healthier growth. Ultimately, an Orbit timer simplifies lawn maintenance and enhances your outdoor space.
Understanding Your Orbit Timer Model
Orbit timer models, such as 96876 and 96954, vary in features. Referencing the specific user manual is crucial for identifying components and functions.
Identifying Your Specific Model Number
Locating your Orbit timer’s model number is the first step towards successful setup and troubleshooting. This crucial piece of information unlocks access to the correct user manual, ensuring you have tailored instructions for your specific device; The model number is typically found on a sticker located on the timer’s casing.
Common locations include the back, bottom, or inside the battery compartment. Look for a series of numbers, often starting with “9” or “5”, such as 96874, 96876-24, 96954, 96956, or 57894-27896. Once identified, you can easily find the corresponding manual online through the Orbit website or other retailers. Having the correct manual guarantees accurate guidance for programming, setting the clock, and understanding advanced features.
Key Components and Their Functions
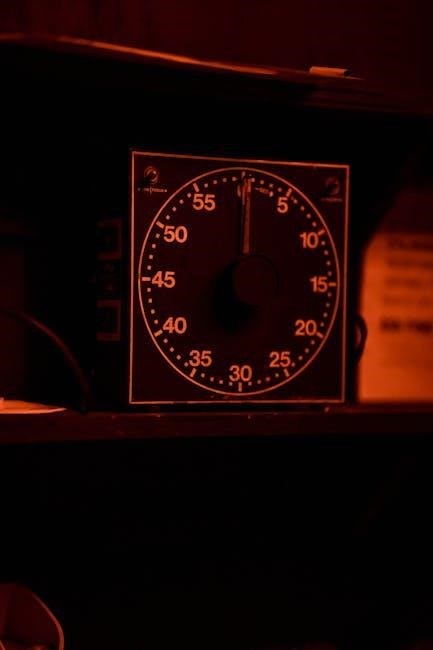
Orbit timers feature several key components essential for operation. The dial allows navigation through programming modes like SET CLOCK and RUN TIME. Arrow buttons ( and -) adjust settings such as time, date, and watering duration for each zone. A display screen clearly shows current settings and programming information.
The GUIDE button, found on some models, accesses electronic program guides. A LIST button displays recorded schedules. Crucially, the timer requires a power source – either batteries or a direct electrical connection. Understanding these components, as detailed in the user manual, is vital for effectively controlling your irrigation system and maximizing water conservation.

Setting Up Your Orbit Timer
Initial setup requires turning off circuit breakers for safety, as outlined in Orbit manuals. Connect the timer and proceed to set the current time and date accurately.
Initial Setup and Power Connection
Before beginning, a crucial safety step detailed in Orbit timer manuals is to ensure all circuit breakers controlling the timer’s power source are switched to the OFF position. This prevents potential electrical shock and safeguards against damage to the timer itself during installation. Locate the timer face, often featuring a large white dial, and prepare the wiring connections.
Carefully connect the power source to the timer, adhering to the wiring diagram specific to your Orbit model – consult the manual for precise instructions. Ensure connections are secure and weatherproof, especially for outdoor installations. Once wired, you can cautiously restore power by flipping the circuit breaker back to the ON position. The timer display should illuminate, indicating a successful power connection and readiness for further setup procedures, like setting the current time.
Setting the Current Time and Date
To accurately set the clock on your Orbit Sprinkler Timer, as outlined in the user manual for Logic Technology models, begin by rotating the dial to the “SET CLOCK” position. This activates the time-setting mode. Utilize the “+” and “-” buttons to adjust the current time of day. For quicker adjustments, hold down either button; the display will scroll more rapidly.
Many Orbit timers don’t require date setting, focusing primarily on time synchronization for scheduling. However, if your model includes date functionality, follow the manual’s instructions to set the month and day. Accurate time and date are vital for ensuring your programmed watering schedules operate correctly and efficiently, delivering water precisely when needed for optimal lawn and garden health.

Programming Watering Schedules
Orbit timers, per the manual, allow customized schedules using zones or stations, defining run times and start times for each watering area efficiently.
Understanding Zones/Stations
Orbit sprinkler timers utilize zones, also referred to as stations, to divide your irrigation system into manageable sections. Each zone controls a specific area of your yard – perhaps the front lawn, back garden, or flowerbeds. Understanding this division is crucial for efficient watering.
The user manual explains that assigning different zones allows you to tailor watering schedules to the unique needs of each landscape area. For example, a sunny front lawn might require more frequent and longer watering cycles than a shaded garden.
To program zones, you’ll typically navigate to a “Zone” or “Station” setting on the timer. The manual guides you through assigning a number to each zone and then configuring individual run times and start times for each, optimizing water usage and plant health.
Setting Run Times for Each Zone
Orbit timer manuals detail setting run times – the duration each zone receives water – crucial for plant health and water conservation. Typically, you’ll turn the dial to the “RUN TIME” position, as outlined in guides for models like the 57894-27896.
The display will then show the current station number and its existing run time. Use the arrow buttons (or + and ─ buttons) to increase or decrease the watering duration. Holding these buttons accelerates the adjustment process.
Consider your plant types and local climate when determining run times. The manual suggests observing your landscape to fine-tune these settings, ensuring adequate hydration without wasteful overwatering. Repeat this process for each zone, customizing the schedule to individual needs.

Setting Start Times for Each Zone
Orbit sprinkler timer manuals emphasize setting appropriate start times for each zone, optimizing water usage and preventing runoff. After establishing run times, navigate to the start time setting – often accessed via the timer’s programming mode or a dedicated “START TIME” position on the dial.
The display will indicate the current start time for the selected zone. Utilize the arrow or + and ─ buttons to adjust the hour and minutes. Consider watering during cooler parts of the day, like early morning, to minimize evaporation.
Orbit’s Easy-Set Logic allows for multiple start times per zone, accommodating varied landscape needs. Refer to your specific model’s manual (96874, 96876) for detailed instructions and ensure each zone’s start time aligns with your watering strategy.

Advanced Features and Settings
Orbit timers offer features like rain delay, manual override, and seasonal adjustments, enhancing control. User manuals detail how to utilize these for optimal watering.
Rain Delay Functionality
Orbit sprinkler timers frequently include a rain delay feature, allowing you to temporarily halt scheduled watering during periods of precipitation. This prevents overwatering and conserves water resources. Accessing this function typically involves navigating through the timer’s menu using the dial and buttons, as outlined in the user manual.
The duration of the rain delay is often adjustable, ranging from hours to several days. Some models allow customization of the delay period, catering to varying weather conditions; Activating the rain delay overrides the programmed schedule until the delay expires or is manually cancelled. Refer to your specific Orbit timer’s manual (models 96874, 96876, etc.) for precise instructions on enabling and configuring this valuable feature. Proper use ensures efficient water management and a healthy landscape.
Manual Watering Override
Orbit sprinkler timers offer a manual watering override, providing immediate control over your irrigation system, bypassing the programmed schedule. This feature is invaluable for addressing localized dry spots or conducting system tests. Typically, activating the override involves pressing and holding a designated button – often labeled “Manual” – as detailed in the Orbit user manual for models like 57894-27896.
During manual mode, you can select specific zones or stations to water, and set a custom run time. The timer will operate in this mode until deactivated, automatically reverting to the programmed schedule. Always consult your specific model’s manual for precise instructions, as the override process can vary. This function provides flexibility and ensures your landscape receives the necessary hydration, even outside of scheduled watering times.
Seasonal Adjustments
Orbit timers frequently include seasonal adjustment features, allowing you to modify watering schedules based on changing weather patterns. As temperatures shift, plant water needs evolve, and these adjustments prevent over or under-watering. Many models, such as those utilizing Easy-Set Logic, offer a percentage-based adjustment – increasing or decreasing run times across all zones proportionally.
Consult your Orbit sprinkler timer’s manual (models 96874, 96876, etc.) to locate the seasonal adjustment setting. This typically involves navigating the menu using the timer’s buttons. A common approach is to set a percentage, like +10% for hotter months or -20% during rainy periods. Implementing seasonal adjustments optimizes water usage and promotes a healthy landscape throughout the year, enhancing the efficiency of your irrigation system.

Troubleshooting Common Issues
Orbit timer manuals address frequent problems like incorrect time displays or inactive zones. Resetting the clock or checking wiring connections are typical solutions.
Timer Not Displaying Correct Time
If your Orbit Sprinkler Timer isn’t showing the correct time, consult the user manual for your specific model – 96874, 96876, or 57894-27896, for example. Typically, you’ll need to enter the “SET CLOCK” position using the dial.
Then, utilize the “+” and “-” buttons to adjust the hour and minutes. Holding these buttons accelerates the time adjustment process. Ensure you’ve correctly set AM or PM. A common mistake is forgetting this step! If the issue persists, check the battery – a low battery can cause inaccurate timekeeping.
Refer to the manual’s troubleshooting section; it may suggest a full reset of the timer. Remember to disconnect power briefly before attempting a reset. Always prioritize safety by turning off circuit breakers before any maintenance.

Zones Not Activating
If a zone isn’t activating on your Orbit Sprinkler Timer (models like 96874 or 57894-27896), first verify the program is correctly set for that zone. Double-check the “RUN TIME” setting for the specific station, ensuring it’s not set to zero. Use the arrow buttons to confirm the duration is appropriate.
Next, inspect the valve wiring connected to the timer. Loose connections or damaged wires can prevent activation. Consult your timer’s manual for wiring diagrams. A manual override function can help determine if the issue lies with the timer or the valve itself.
Ensure all circuit breakers are in the “ON” position. If problems continue, a valve malfunction might be the cause, requiring professional repair.

Maintaining Your Orbit Timer
Orbit timer upkeep involves annual battery replacement and proper winterization, as detailed in the user manual, to ensure longevity and reliable operation.
Battery Replacement
Maintaining optimal performance of your Orbit timer relies on timely battery replacement. The user manual emphasizes checking the batteries at least annually, or when the display appears dim or erratic. Typically, Orbit timers utilize AA or AAA alkaline batteries – consult your specific model’s manual for confirmation.
To replace the batteries, locate the battery compartment, usually on the timer’s face or back, secured by a small latch or screw. Gently open the compartment and remove the old batteries, noting the correct polarity (+ and -). Insert fresh batteries, ensuring proper alignment.
Crucially, after battery replacement, you may need to reset the time and date, as well as re-program your watering schedules. Refer to the “Setting the Current Time and Date” and “Programming Watering Schedules” sections of the manual for detailed instructions. Failure to do so will result in incorrect operation.
Winterization and Storage
Protecting your Orbit timer from freezing temperatures is vital for longevity. The user manual recommends winterizing the system before the first frost. First, disconnect the timer from the power source – remove batteries if applicable. Detach the timer from the faucet and valve.
Thoroughly drain all water from the timer and connected pipes to prevent damage from freezing. Store the timer indoors in a dry location, away from extreme temperatures. Avoid storing it in a garage or shed that isn’t climate-controlled.
Before storing, clean the timer with a damp cloth. When spring arrives, inspect the timer for any damage before reconnecting it. Refer to the “Initial Setup and Power Connection” section of the manual for re-installation instructions. Proper winterization ensures reliable operation next season.