
dewalt 735 planer owners manual
DEWALT DW735 Planer Owners Manual: A Comprehensive Guide
This manual details the DEWALT DW735 planer’s operation‚ safety‚ and maintenance‚ offering a comprehensive resource for users seeking optimal performance and longevity.
The DEWALT DW735 is a powerful and versatile 13-inch planer designed for both professional woodworkers and serious DIY enthusiasts. This manual serves as your guide to safely and effectively utilizing its capabilities. It’s a double-insulated power tool‚ eliminating the need for an earth wire‚ enhancing user safety.
This planer allows for precise material removal‚ creating smooth‚ consistent surfaces on boards of varying thicknesses. Understanding its features‚ from the feed table to the blade head‚ is crucial for achieving optimal results. Accessing the official DEWALT Service Net (servicenet.dewalt.com/Products/Detail/DW735) provides additional resources‚ including parts diagrams and the full instruction manual (DW735-XE).
Safety Guidelines and Precautions
Prioritize safety when operating the DEWALT DW735 planer. Always inspect extension cords for damage – loose wires or defective fittings – and replace them if necessary. This appliance isn’t intended for use by young children or individuals with infirmities without proper supervision.
Wear appropriate eye and respiratory protection to shield against flying debris and dust. Never operate the planer with damaged parts. Disconnect the power supply before making adjustments or changing blades. Be mindful of the rotating blade and avoid reaching under the infeed or outfeed tables during operation. Follow all instructions carefully to prevent injury and ensure safe operation.
Understanding the Planer Components
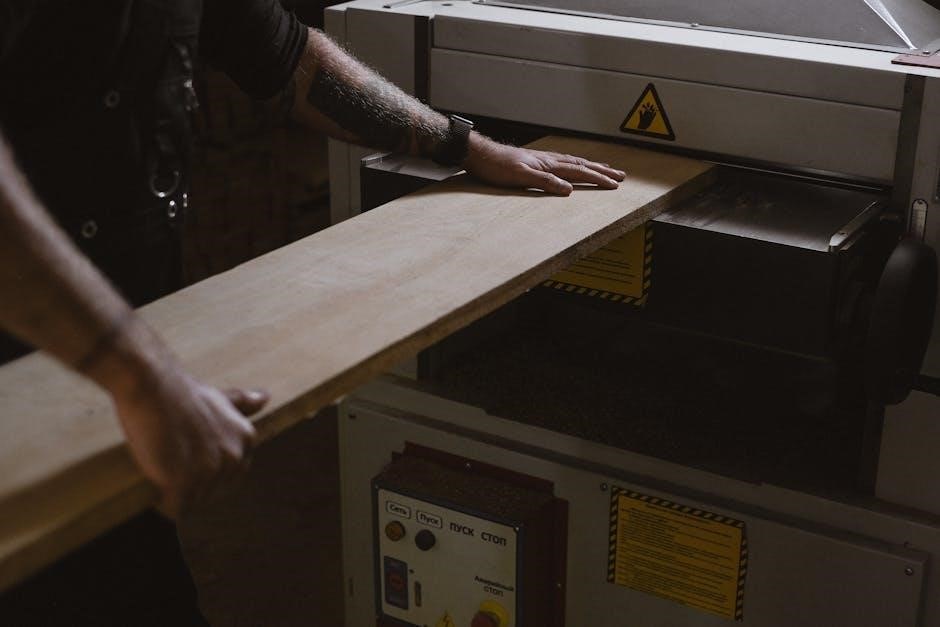
The DEWALT DW735 consists of several key components. The planer base and motor housing provide a stable foundation for the powerful motor. The feed table and depth adjustment knob control material flow and cutting depth. Infeed and outfeed tables support the workpiece before and after planing.
Crucially‚ the blade head and blades perform the actual cutting action. Familiarize yourself with each part’s function for safe and effective operation. Understanding these components allows for proper assembly‚ adjustment‚ and maintenance‚ maximizing the planer’s performance and extending its lifespan.
Planer Base and Motor Housing
The robust planer base provides stability during operation‚ minimizing vibrations and ensuring accurate cuts. It’s constructed from cast iron for durability and weight. The motor housing securely encloses the powerful motor‚ protecting it from dust and debris.
This housing is designed for efficient heat dissipation‚ preventing overheating during extended use. Regularly inspect the base for any damage or instability. Ensure the motor housing vents are clear of obstructions to maintain optimal performance and prolong the life of the motor. Proper care of these components is vital.
Feed Table and Depth Adjustment Knob
The feed table smoothly guides the workpiece through the planer‚ ensuring consistent material removal. Its surface is designed to minimize friction and prevent tear-out. The depth adjustment knob allows precise control over the cutting depth‚ enabling users to achieve desired results with each pass.
Fine adjustments are crucial for delicate work‚ while larger settings facilitate faster material removal. Regularly check the feed table for cleanliness and proper alignment. Ensure the depth adjustment knob clicks securely into each setting to maintain accuracy. Proper use of these features guarantees optimal planing performance.
Infeed and Outfeed Tables
The infeed and outfeed tables are essential components‚ supporting the workpiece as it enters and exits the planer. They provide a stable and level surface‚ minimizing vibration and ensuring a smooth‚ consistent cut. Proper alignment of these tables is critical for preventing snipe – the unwanted indentation at the beginning or end of the board.
Adjusting these tables ensures they are perfectly level with the cutterhead height. Regularly inspect the tables for damage or debris. Maintaining clean and aligned infeed and outfeed tables contributes significantly to the overall quality and precision of your planing operations.

Blade Head and Blades
The blade head houses the high-speed steel blades‚ responsible for removing material and creating a smooth surface. Regularly inspecting blade sharpness is crucial for optimal performance and preventing tear-out. Dull blades can lead to uneven planing and increased motor strain.
The DW735 utilizes double-sided blades‚ offering two cutting edges per blade for extended use. Proper installation and tightening of the blades are essential for safety and accurate cutting. Always ensure blades are securely fastened before operation. Replacement blades‚ often 13-inch in length‚ are readily available.
Assembly and Initial Setup
Before first use‚ carefully unpack the DEWALT DW735 and verify all components are present. Initial setup involves attaching the infeed and outfeed tables‚ ensuring they are securely fastened for stable material support. Proper alignment is vital for consistent planing results.
Next‚ install the blade head‚ following the instructions for correct blade orientation and tightening. Double-check the blade security before powering on the planer. Familiarize yourself with the depth adjustment knob and other controls. A well-assembled and properly set-up planer ensures safe and efficient operation.
Attaching the Infeed and Outfeed Tables
Securely attach the infeed and outfeed tables to the planer base using the provided hardware. Ensure proper alignment; the tables should be flush with the planer’s surface for smooth material flow. Tighten all bolts firmly‚ but avoid over-tightening‚ which could damage the mounting points.
Verify the tables are stable and don’t wobble. These tables provide crucial support during planing‚ preventing snipe and ensuring consistent depth of cut. Correct installation is paramount for achieving accurate and professional results. Refer to the diagrams in the manual for visual guidance during this assembly step.
Installing the Blade Head
Carefully install the blade head into the planer‚ ensuring it seats correctly within the housing. Align the mounting points and secure it with the provided bolts‚ tightening them in a criss-cross pattern for even pressure. Double-check that the blade head is firmly attached and doesn’t exhibit any wobble.
Before operation‚ always verify the blades are properly installed and sharp. A loose or dull blade head can lead to inaccurate cuts and potential safety hazards. Refer to the detailed diagrams in the owner’s manual for precise blade head installation instructions and torque specifications.
Operating Instructions
Before powering on‚ ensure the work piece is securely supported and free of obstructions. Activate the planer using the power switch‚ allowing the motor to reach full speed before engaging the wood. Adjust the cutting depth incrementally using the depth adjustment knob‚ taking shallow passes for optimal results.
Control the feed rate by applying consistent pressure to the wood‚ avoiding forcing the planer. Utilize the depth stop for repetitive cuts at a specific thickness. Always disconnect the power before making adjustments or performing maintenance. Refer to the manual for detailed operating procedures and safety precautions.
Powering On and Off
To initiate operation‚ connect the DW735 to a properly grounded power outlet. Ensure the switch is in the “off” position before plugging in. Depress and hold the power switch to start the motor; release to stop. Never force the switch. Always allow the blade to come to a complete stop before making adjustments or leaving the planer unattended.
Double-check the work piece and surrounding area before powering on. If the planer fails to start‚ disconnect the power and inspect the cord and connections. Refer to the troubleshooting section of the manual for further assistance. Prioritize safety during all powering procedures.
Adjusting the Cutting Depth
The DW735’s cutting depth is adjusted using the depth adjustment knob located on the front of the planer. Each rotation of the knob corresponds to a specific thickness removal. Begin with a shallow cut and incrementally increase the depth for optimal results. Always ensure the planer is switched off and unplugged before making adjustments.
Utilize the depth stop for consistent cuts across multiple passes. Regularly check the depth setting against your desired material thickness. Avoid excessive depth in a single pass‚ as this can strain the motor and compromise finish quality. Refer to the manual’s charts for recommended depth settings.
Feed Rate Control
Controlling the feed rate – the speed at which you move the planer across the wood – is crucial for achieving smooth‚ consistent results. A slower feed rate generally produces a finer finish‚ especially with harder wood types. Conversely‚ a faster feed rate is suitable for softer woods and removing material quickly.
The DW735 doesn’t have adjustable feed rollers; control is entirely manual. Maintain a steady‚ even pace‚ avoiding rushing or forcing the planer. Listen to the motor; straining indicates the feed rate is too fast. Practice on scrap wood to determine the optimal speed for different materials and desired finishes.
Using the Depth Stop
The depth stop on the DEWALT DW735 allows for precise‚ repeatable cuts‚ essential for consistent thickness across multiple boards. It’s particularly useful when planing a series of pieces to a specific dimension. To utilize it‚ loosen the depth adjustment knob‚ position the depth stop at the desired cut depth‚ and retighten the knob securely.
Always test the setting on scrap wood before committing to your workpiece. Remember that each pass removes a small amount of material; multiple shallow cuts are preferable to a single deep cut for optimal results and reduced strain on the planer.
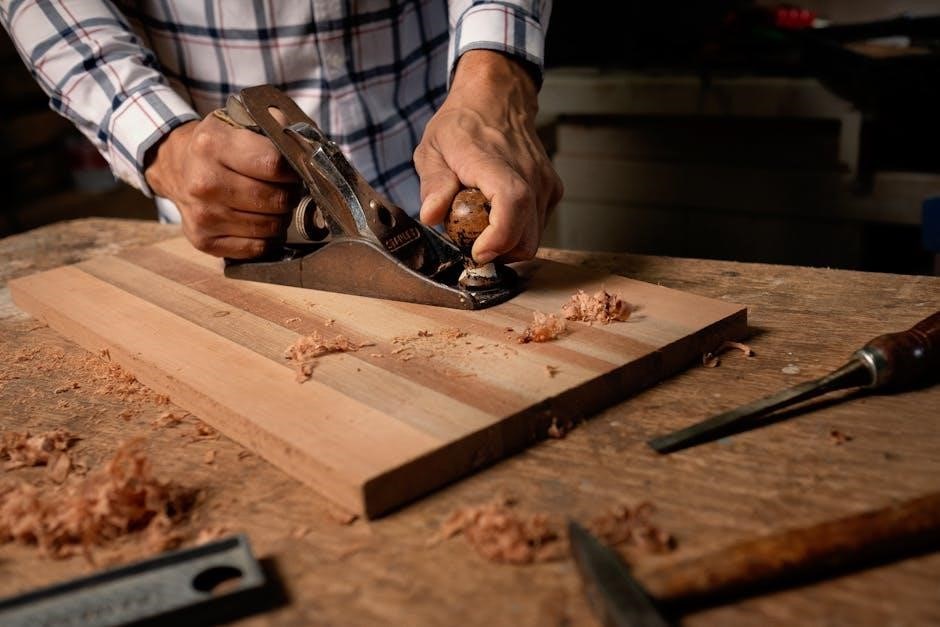
Blade Maintenance and Replacement
Maintaining sharp blades is crucial for achieving clean‚ efficient planing with your DEWALT DW735. Regularly checking blade sharpness prevents tear-out and ensures a smooth finish. Dull blades require more power‚ increasing wear and tear on the motor. Removing and installing blades requires careful attention to safety procedures‚ always disconnecting the power supply first.

Blade sharpening techniques vary; you can use a honing guide and sharpening stones or opt for professional sharpening services. Replacement blades are readily available‚ with 13-inch planer blade replacements specifically designed for the DW735‚ often sold in multi-packs with screws.
Checking Blade Sharpness
Regularly assessing blade sharpness is vital for optimal DW735 performance. A simple test involves running your fingernail across the blade’s edge; a sharp blade will catch‚ while a dull one will slide. Examine the wood surface after planing – tear-out or splintering indicates dull blades. Checking for nicks or damage is also essential‚ as these can affect planing quality.
Consistent sharpness ensures clean cuts and reduces strain on the motor. If you notice any dullness or damage‚ it’s time for blade sharpening techniques or replacement. Prioritize safety during inspection‚ always disconnecting the power before handling the blades.
Removing and Installing Blades
Before any blade work‚ disconnect the planer from power! To remove blades‚ loosen the blade retaining screws using the correct screwdriver. Carefully lift out the old blade‚ noting its orientation for correct re-installation. Inspect the blade seats for debris and clean them thoroughly.
When installing new blades‚ ensure they are the correct type for the DW735. Position the blade with the cutting edge facing the direction of rotation. Tighten the retaining screws securely‚ but avoid over-tightening. Double-check blade alignment before operation to prevent damage and ensure smooth planing.
Blade Sharpening Techniques
Maintaining sharp blades is crucial for optimal performance. Dull blades cause tear-out and require more power. Sharpening can be done with a honing guide and sharpening stones‚ or by a professional service. Ensure the bevel angle is consistent with the original factory angle.
When using stones‚ start with a coarser grit to remove material‚ then progress to finer grits for a polished edge. Always use lubrication during sharpening. After sharpening‚ deburr the blade to remove any wire edge. Regular sharpening extends blade life and ensures clean‚ precise cuts.
Troubleshooting Common Issues
If the planer doesn’t start‚ check the power cord‚ circuit breaker‚ and ensure the motor isn’t overloaded. Uneven planing often indicates dull or improperly set blades; inspect and adjust them accordingly. A burning smell during operation suggests excessive feed rate or dull blades causing friction – reduce speed or sharpen/replace blades.
Inspect the infeed and outfeed tables for obstructions. Verify proper blade installation and tightness. If issues persist‚ consult the DEWALT Service Net resources for detailed troubleshooting guides and potential repair options. Always disconnect power before performing any inspection or maintenance.
Planer Not Starting
If your DW735 fails to power on‚ begin by verifying the power cord is securely connected to both the planer and a functioning electrical outlet. Check the circuit breaker or fuse box to ensure the circuit hasn’t tripped or blown. Inspect the cord for any damage‚ like loose wires or exposed insulation‚ and replace if necessary.
Ensure the motor isn’t overloaded by attempting to feed too much material at once. Confirm the on/off switch is fully engaged. If the issue continues‚ consult the DEWALT Service Net resources for further diagnostics and potential repair solutions.
Uneven Planing

If experiencing uneven planing‚ first verify the blades are sharp and properly installed. Dull or improperly seated blades are a common cause. Ensure the feed table is clean and free of debris‚ as obstructions can affect the cut. Check the infeed and outfeed tables are aligned correctly and at the same height.
Adjust the depth of cut to a smaller increment; taking too large a pass can strain the motor and lead to uneven results. Confirm the wood is flat and free of twists or bows before planing. Consistent feed rate is also crucial for a smooth‚ even surface.
Burning Smell During Operation
A burning smell typically indicates friction or overheating. Immediately power off the planer and disconnect it from the power source. Inspect the blades for excessive wear or damage‚ and ensure they are correctly installed. Check the motor housing for sawdust buildup‚ which can restrict airflow and cause overheating.
Verify the feed rate isn’t too slow‚ as this can create excessive friction. Ensure the wood being planed isn’t excessively resinous‚ as some wood types generate more heat during cutting. If the smell persists after cleaning and inspection‚ contact DEWALT service for assistance.
Extension Cord Usage
When using extension cords with the DW735 planer‚ prioritize safety and performance. Always inspect the cord before each use for any loose wires‚ damaged insulation‚ or defective fittings. Replace damaged cords immediately to prevent electrical shock or fire hazards. Use a heavy-duty extension cord of the correct gauge to handle the planer’s amperage requirements.
Avoid using excessively long cords‚ as they can cause voltage drop and reduce the planer’s power. Ensure the cord is properly grounded if it has a grounding pin. Keep the cord clear from the work area to prevent tripping hazards and damage.
Transporting the Planer

When transporting the DEWALT DW735 planer‚ always disconnect it from the power source and allow it to cool down completely. Securely fasten the planer to prevent movement during transit‚ utilizing straps or tie-downs if necessary. Protect the infeed and outfeed tables from damage by padding or removing them.
Avoid dropping or subjecting the planer to rough handling‚ as this can damage internal components. Consider using the original packaging for transportation‚ if available. Be mindful of the planer’s weight when lifting and carrying it‚ and use proper lifting techniques to avoid injury.
Understanding Double Insulation
The DEWALT DW735 planer features double insulation‚ a safety measure that eliminates the need for a grounding wire. This construction involves two layers of insulation within the tool’s motor housing‚ providing enhanced protection against electric shock. Double insulation reduces the risk of electrical hazards‚ even if the internal wiring becomes damaged.
However‚ it’s crucial to maintain the integrity of the insulation by avoiding modifications or repairs that could compromise its effectiveness. Regularly inspect the power cord for damage and replace it if necessary. Do not attempt to open the tool’s housing yourself; refer to qualified service personnel for repairs.
Precautions for Young Children and Infirm Individuals
This DEWALT DW735 planer is not intended for use by young children or individuals with reduced physical‚ sensory‚ or mental capabilities. Close supervision is essential when the tool is used near children. Ensure children do not play with the planer or have unsupervised access to it. Individuals with limited experience or knowledge of power tools should receive proper instruction before operation.
Those with pre-existing medical conditions that could be aggravated by tool vibration or physical exertion should consult a physician before use. Always prioritize safety and prevent unauthorized access to the planer to avoid potential accidents or injuries.
DEWALT Service Net Resources
DEWALT provides extensive online resources through its Service Net platform for DW735 planer owners. Access detailed manuals‚ parts diagrams‚ and ordering capabilities at servicenet.dewalt.com/Products/Detail/DW735. This platform allows you to quickly locate the instruction manual in PDF format and identify specific replacement parts.
Parts diagrams simplify maintenance and repair‚ while the ordering system streamlines the process of acquiring necessary components. DEWALT Service Net is a valuable tool for ensuring the longevity and optimal performance of your DW735 planer‚ offering self-service support options.

Accessing the DW735 Manual Online
The DEWALT DW735 planer’s operation manual is readily available online through the DEWALT Service Net portal. A direct link‚ servicenet.dewalt.com/Products/Detail/DW735‚ provides immediate access to the PDF version of the 33-page document.
This digital manual covers all aspects of the planer‚ from safety precautions and component identification to operating instructions and maintenance procedures. Downloading the manual allows for convenient offline access‚ ensuring you always have critical information at your fingertips. DEWALT’s online resource simplifies obtaining the guidance needed for safe and effective operation.
Parts Diagrams and Ordering
DEWALT Service Net is the primary resource for accessing detailed parts diagrams for the DW735 planer. These diagrams visually illustrate each component‚ aiding in identification when replacements are needed. The online portal facilitates streamlined parts ordering directly from DEWALT or authorized dealers.
Locating the correct part number is simplified through the interactive diagrams‚ ensuring compatibility and a proper fit. Users can efficiently identify and purchase blades‚ belts‚ or any other necessary replacement parts. Maintaining your DW735 is easier with readily available parts and clear visual guides‚ extending the tool’s lifespan and performance.
Installing Katya Ironworks Precision Mount
The Katya Ironworks Precision Mount enhances the DEWALT DW735 planer’s capabilities by providing a stable and accurate platform for a Wixey WR510 DRO (Digital Readout). This upgrade significantly improves the precision of depth readings‚ crucial for accurate planing.
Installation involves securely attaching the mount to the planer‚ ensuring proper alignment with the blade head. Detailed instructions are available from Katya Ironworks‚ guiding users through the process step-by-step. The mount allows for easy DRO integration‚ transforming the DW735 into a highly precise woodworking tool‚ ideal for demanding projects.
13-Inch Planer Blade Replacements
Maintaining sharp blades is vital for optimal performance of the DEWALT DW735 planer. 13-inch planer blade replacements are readily available‚ offering a cost-effective solution for restoring cutting efficiency. These replacement blades‚ often sold in 3-packs with accompanying screws‚ ensure a clean and consistent cut.
When replacing blades‚ always prioritize safety and follow the manufacturer’s instructions. Ensure the blades are properly aligned and securely fastened to the blade head. Using high-quality replacement blades extends the planer’s lifespan and delivers professional-grade results‚ improving the quality of your woodworking projects.
Instruction Manual DW735-XE
The DW735-XE instruction manual‚ a 16-page document‚ provides detailed guidance for operating and maintaining this specific DEWALT planer model. It covers essential aspects like assembly‚ safety precautions‚ and troubleshooting common issues. Users can access this manual to understand the planer’s features and ensure safe‚ efficient operation.
The manual outlines proper procedures for adjusting cutting depth‚ controlling feed rate‚ and utilizing the depth stop. It also details blade maintenance‚ including sharpening and replacement techniques. Referencing the DW735-XE manual is crucial for maximizing the planer’s performance and preventing potential damage or injury.
Efficient Small Workshop Layout Considerations
Integrating the DEWALT DW735 planer into a small workshop requires careful layout planning. Prioritize adequate space around the planer for material handling and safe operation – consider infeed and outfeed support. Dust collection is critical; position the planer near a dust port or collection system.
Optimize workflow by placing frequently used tools nearby. Maximize vertical space with shelving to store accessories and lumber. Ensure sufficient lighting for clear visibility during planing operations. A well-organized workshop enhances efficiency and safety when utilizing the DW735 planer.