
closetmaid wire shelving installation instructions pdf
ClosetMaid Wire Shelving Installation: A Comprehensive Guide
Today, February 5th, 2026, access official ClosetMaid installation PDFs online, featuring images, addresses, and detailed processes for a successful shelving setup.
Understanding Your ClosetMaid System
ClosetMaid systems offer versatile storage solutions, but mastering installation begins with understanding the core components and how they interact. Accessing the official closetmaid wire shelving installation instructions PDF is paramount; these documents, available online, detail the system’s modular design.
These PDFs showcase images and addresses for support, guiding you through the process. Familiarize yourself with the various shelf types, bracket styles, and accessory options. Knowing how these elements connect ensures a stable and customized closet organization. The system’s adaptability allows for adjustments as your needs evolve, making the initial understanding crucial for long-term satisfaction. Proper planning, aided by the PDF, minimizes errors and maximizes space.
Identifying System Components
A successful ClosetMaid installation hinges on correctly identifying each component. The closetmaid wire shelving installation instructions PDF provides detailed visuals and part lists. Key elements include vertical standards (the upright tracks), shelf brackets, and the wire shelves themselves.
You’ll also encounter various accessories like closet rods, drawers, and baskets. The PDF clarifies distinctions between component types, crucial for proper assembly. Pay close attention to bracket styles – some are fixed, others adjustable. Understanding screw types and their intended use, as outlined in the PDF, prevents damage. Accurate identification, referencing the document’s images and addresses, streamlines the installation process and ensures compatibility.
Tools Required for Installation
The closetmaid wire shelving installation instructions PDF details essential tools for a smooth setup. A power drill is paramount, alongside various drill bits suitable for your wall type (drywall, plaster, or concrete – see wall type considerations). A level is critical for ensuring shelves are perfectly horizontal.
A measuring tape guarantees accurate spacing, while a pencil marks standard locations. A stud finder locates wall studs for secure anchoring. Screwdrivers (Phillips and flathead) are needed for bracket attachment. Safety glasses and gloves, emphasized in safety precautions, are non-negotiable. The PDF may also suggest a rubber mallet for gently adjusting components. Having these tools prepared beforehand, as per the document, saves time and frustration.
Preparing for Installation
Before commencing, the closetmaid wire shelving installation instructions PDF stresses thorough preparation. Clear the entire closet space, removing all existing contents. Protect your flooring with a drop cloth to prevent scratches or damage during installation. Carefully unpack all ClosetMaid components and verify against the parts list within the PDF to ensure everything is present.

Review the entire installation guide – understanding the process beforehand minimizes errors. Identify your wall type (drywall, plaster, concrete) as this dictates the appropriate hardware. Gather all necessary tools (detailed in the tools section). Finally, familiarize yourself with safety precautions, including wearing safety glasses and gloves, as highlighted in the document.

Measuring Your Closet Space
The closetmaid wire shelving installation instructions PDF emphasizes precise measurements for optimal results. Begin by measuring the closet’s width, depth, and height using a tape measure. Record these dimensions accurately, noting any irregularities like sloping ceilings or uneven floors. Measure the distance between door frames or obstructions, as these will impact shelf placement.
Pay close attention to wall thickness, especially when marking standard locations. The PDF recommends measuring multiple points to account for potential variations. Accurate measurements are crucial for planning your shelf layout and ensuring a secure, level installation. Double-check all figures before proceeding to the planning stage, avoiding costly mistakes later.
Planning Your Shelf Layout
The closetmaid wire shelving installation instructions PDF stresses thoughtful layout planning. Consider your storage needs – hanging space, folded clothes, shoes, and accessories. Sketch a rough draft of your closet, indicating desired shelf heights and locations. Utilize the PDF’s diagrams for inspiration and standard spacing recommendations.
Maximize vertical space by adjusting shelf heights to accommodate different items. Plan for sufficient clearance above hanging rods. The PDF highlights the importance of accessibility; frequently used items should be within easy reach. Visualize the finished product, ensuring a functional and aesthetically pleasing design. A well-planned layout minimizes wasted space and enhances closet organization.
Wall Type Considerations (Drywall, Plaster, Concrete)
The closetmaid wire shelving installation instructions PDF emphasizes adapting installation techniques to your wall type. For drywall, use appropriate anchors designed to securely hold the weight of the shelving system. Plaster walls may require pre-drilling and specialized anchors to prevent cracking. Concrete walls necessitate the use of masonry drill bits and concrete anchors for a robust installation.
The PDF details specific anchor recommendations for each material, ensuring stability and preventing damage. Always verify wall stud locations to maximize support. Ignoring wall type considerations can lead to shelf collapse or wall damage. Prioritize safety by selecting the correct hardware and following the PDF’s guidelines meticulously.
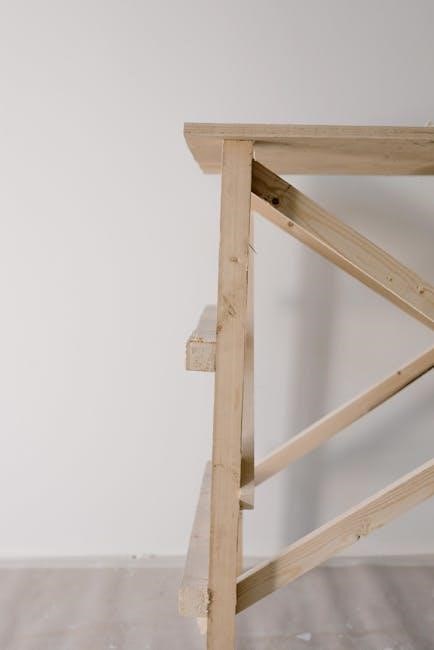
Installation Process — Vertical Standards
The closetmaid wire shelving installation instructions PDF begins with installing the vertical standards, the core of the system. These standards provide the framework for all shelves and accessories. The PDF stresses precise measurement and marking of standard locations, ensuring consistent spacing and level alignment.
It details a step-by-step process, including pre-drilling pilot holes and securely fastening the standards to the wall using appropriate screws and anchors. The document highlights the importance of plumbness – verifying standards are perfectly vertical – for optimal shelf stability. Proper installation of these standards is crucial for the entire system’s functionality and load-bearing capacity.
Marking Standard Locations
The closetmaid wire shelving installation instructions PDF emphasizes meticulous marking of vertical standard locations. Begin by determining the desired shelf heights and overall layout, referencing the planned design. Use a level and pencil to create precise vertical lines on the wall, indicating where each standard will be mounted.
The PDF advises double-checking measurements to ensure consistent spacing between standards. It also recommends marking stud locations to maximize anchoring strength. Accurate marking is paramount; errors at this stage can compromise the entire system’s stability and appearance. Consider using a stud finder for precise stud identification before marking.
Installing Vertical Standards – Step-by-Step
The closetmaid wire shelving installation instructions PDF details a step-by-step process for securing vertical standards. First, pre-drill pilot holes at the marked locations, using a drill bit size recommended in the PDF. Then, align the standard with the pilot holes and use appropriate screws (often provided in the kit) to attach it firmly to the wall.
The PDF stresses the importance of ensuring the standard is plumb (perfectly vertical) during installation. Use a level frequently throughout this process. For drywall installation, the PDF may suggest using wall anchors for added support. Tighten screws securely, but avoid over-tightening, which could strip the screw holes.
Ensuring Standard Alignment & Stability
The closetmaid wire shelving installation instructions PDF emphasizes consistent alignment as crucial for a functional closet system. Regularly check vertical standards with a level – both vertically and against each other – during installation. Any deviation impacts shelf leveling. The PDF recommends using a long level spanning multiple standards simultaneously for accuracy.
Stability is paramount; the PDF details using appropriate wall anchors for drywall or plaster, and potentially concrete screws for masonry. Ensure screws are securely fastened, but not stripped. If standards feel wobbly, re-tighten screws or consider adding additional anchors. A stable foundation prevents future sagging and ensures long-term durability of the shelving system.
Installing Shelves & Brackets

The closetmaid wire shelving installation instructions PDF clearly illustrates bracket attachment to the vertical standards. Typically, brackets snap or screw into pre-drilled holes, allowing for adjustable shelf heights. The PDF stresses confirming bracket compatibility with your specific shelving unit before installation. Ensure brackets are firmly seated and locked into place, preventing accidental dislodgement.
Once brackets are secure, the PDF guides users through placing the wire shelves onto them. Proper alignment is key; shelves should rest evenly on all brackets. The document often includes diagrams showing correct shelf orientation. Double-check that shelves are fully supported before adding any weight, ensuring a stable and organized closet space.
Attaching Shelf Brackets to Standards
The closetmaid wire shelving installation instructions PDF details bracket attachment, often involving a simple snap-in or screw-in method to the vertical standards. It emphasizes selecting the correct bracket type for your shelf depth and weight capacity. The PDF frequently features detailed diagrams illustrating proper bracket orientation and locking mechanisms.
Crucially, the instructions highlight the importance of ensuring a secure connection. Brackets should click firmly into place or be tightened with screws to prevent slippage. The PDF may advise using a level to confirm brackets are horizontally aligned before proceeding. Consistent bracket spacing is also recommended for a uniform shelf appearance and optimal stability.
Installing Wire Shelves onto Brackets
The closetmaid wire shelving installation instructions PDF demonstrates how wire shelves easily rest upon the attached brackets. Typically, shelves simply drop into place, supported by the bracket arms; however, some models may require a slight downward pressure to fully seat the shelf. The PDF often includes visual guides showing the correct shelf positioning relative to the brackets.
It’s vital to verify each shelf is securely supported before loading items. The instructions may caution against uneven weight distribution, potentially causing shelf instability. The PDF also details how to adjust shelf height by relocating the brackets within the standards, offering customizable storage solutions. Diagrams illustrate bracket removal and re-installation for flexible configurations.
Shelf Spacing & Adjustability
The closetmaid wire shelving installation instructions PDF emphasizes the system’s adaptability. Shelf spacing is determined by the bracket placement along the vertical standards, allowing customization for various storage needs – long hanging clothes, folded items, or bulky storage containers. The PDF illustrates how to easily relocate brackets to modify shelf heights.
Typically, brackets can be repositioned into any of the pre-drilled holes within the standards. The instructions often recommend considering the items you intend to store when determining optimal spacing. Diagrams within the PDF showcase different configurations and suggest appropriate distances. Maintaining consistent spacing contributes to a visually balanced and functional closet. Adjustability is a key feature highlighted throughout the documentation.
Adding Closet Accessories
The closetmaid wire shelving installation instructions PDF details a range of accessories to maximize closet functionality. These include closet rods for hanging clothes, drawers and baskets for concealed storage, and specialized organizers like tie/belt racks and shoe holders. The PDF provides specific guidance on attaching each accessory to the installed shelving system.
Installation typically involves utilizing the existing vertical standards and compatible hardware. Diagrams illustrate proper placement and secure fastening techniques. The document often highlights accessory kits designed for seamless integration with the wire shelving. Consider your storage needs when selecting accessories; the PDF offers suggestions for optimizing space and organization. Proper installation ensures accessories are stable and enhance the overall closet design.
Installing Closet Rods
The closetmaid wire shelving installation instructions PDF provides clear steps for installing closet rods, essential for hanging garments. Typically, this involves utilizing ClosetMaid’s rod brackets, which attach directly to the vertical standards already installed in your closet. The PDF illustrates various bracket types suited for different rod depths and weight capacities.
Ensure brackets are securely fastened to the standards at the desired height, referencing the PDF’s diagrams for proper alignment. The rod itself then rests within the brackets. The document emphasizes checking rod stability before loading with clothes. Consider the length of your closet when determining the number of brackets needed for adequate support. Proper installation prevents sagging and ensures long-lasting functionality.
Adding Drawers & Baskets
The closetmaid wire shelving installation instructions PDF details how to integrate drawers and baskets into your system, maximizing storage versatility. These components often utilize specialized mounting hardware that connects to the existing vertical standards. The PDF showcases different drawer and basket sizes, allowing customization based on your needs.
Installation typically involves sliding the drawer or basket mounting rails onto the standards at the desired height, then securing them. The drawers/baskets themselves then slide into these rails. The document stresses verifying the rails are level before fully inserting the units; Baskets often simply hang from the standards using hooks. Refer to the PDF for weight limits to avoid overloading and ensure smooth operation.
Installing Tie/Belt Racks & Shoe Holders
The closetmaid wire shelving installation instructions PDF provides clear guidance on adding tie/belt racks and shoe holders to your organized space. These accessories typically attach directly to the ClosetMaid vertical standards, utilizing specialized brackets detailed within the document. The PDF illustrates various rack and holder designs, catering to different accessory types and quantities.
Installation usually involves sliding the bracket onto the standard at the preferred height and securing it. Tie/belt racks often feature hooks or bars, while shoe holders may be tiered or individual slots. The PDF emphasizes confirming bracket stability before loading with accessories. It also highlights weight capacity limits for each component, ensuring safe and efficient use of your closet system.
Troubleshooting Common Issues
The closetmaid wire shelving installation instructions PDF dedicates a section to resolving frequent installation challenges. Uneven walls are addressed with shimming techniques, detailed with illustrative diagrams, ensuring vertical standards remain plumb. Bracket instability is often due to improper standard mounting; the PDF reiterates secure screw placement into wall studs or appropriate anchors.
Shelf leveling problems are tackled by adjusting bracket heights and confirming standard alignment. The document stresses the importance of re-checking measurements throughout the process. It also provides guidance on identifying and correcting misaligned components. Furthermore, the PDF includes a safety checklist, reminding users to avoid overloading shelves and to always wear appropriate safety gear during adjustments.
Dealing with Uneven Walls
The closetmaid wire shelving installation instructions PDF specifically addresses the common issue of uneven walls. It details using shims – thin, tapered pieces of material – behind the vertical standards to create a plumb and level installation. The PDF illustrates various shimming techniques, showing placement at the top, bottom, and even mid-point of the standards.
It emphasizes the importance of consistently checking for plumb using a level throughout the process. The document advises against relying solely on the wall’s surface and encourages careful measurement and adjustment. Furthermore, it suggests using a longer level for greater accuracy when dealing with significant wall irregularities, ensuring a stable and visually appealing shelving system.
Addressing Bracket Instability
The closetmaid wire shelving installation instructions PDF provides troubleshooting steps for bracket instability, a frequent concern during installation. It highlights the critical importance of correctly securing the shelf brackets to the vertical standards, ensuring a ‘click’ sound confirms proper engagement. The PDF details checking for damaged or warped brackets, recommending replacement if necessary.
It also addresses scenarios where screws strip within the standards, suggesting using slightly larger diameter screws or wood glue with toothpicks to reinforce the screw hole. The document stresses avoiding overloading shelves, as excessive weight contributes to bracket strain. Finally, it advises re-evaluating standard spacing if instability persists, potentially requiring additional standards for enhanced support.
Correcting Shelf Leveling Problems
The closetmaid wire shelving installation instructions PDF offers solutions for uneven shelves, a common issue during setup. It emphasizes using a level to verify shelf horizontality after bracket installation, before fully securing the wire shelf. If a shelf isn’t level, the PDF instructs to slightly loosen the bracket’s set screws on the vertical standard.
Minor adjustments can then be made to the bracket’s position, re-leveling, and re-tightening the screws. For significant discrepancies, the document suggests checking the vertical standards themselves for plumbness, potentially requiring re-installation. It also notes that slight variations in wall flatness can contribute to leveling issues, and shims may be needed for optimal results.
Safety Precautions
The closetmaid wire shelving installation instructions PDF prominently features safety guidelines. It strongly advises wearing safety glasses to protect eyes from dust and debris during drilling and installation. Gloves are also recommended to prevent hand injuries from sharp shelf edges or hardware. The PDF cautions against overloading shelves, specifying weight limits based on shelf span and bracket spacing.
It stresses the importance of using appropriate wall anchors for the wall type (drywall, plaster, concrete) to ensure secure mounting and prevent collapse. The document also warns against using damaged or worn components, and to always disconnect power before working near electrical outlets. Following these precautions ensures a safe and successful installation process.
Wearing Safety Glasses & Gloves
The closetmaid wire shelving installation instructions PDF consistently emphasizes personal protective equipment. Specifically, it mandates wearing safety glasses throughout the entire installation process. This precaution shields your eyes from flying debris generated during drilling into walls and attaching hardware components. Dust particles and small metal fragments pose a significant risk of eye irritation or injury.
Furthermore, the PDF strongly recommends utilizing work gloves. Gloves protect hands from sharp edges on wire shelving, bracket corners, and potentially from splinters when handling wood components. They also provide a better grip during tightening screws and maneuvering heavier shelf pieces, minimizing the risk of slips and hand abrasions during installation.
Avoiding Overloading Shelves
The closetmaid wire shelving installation instructions PDF dedicates a section to weight capacity and preventing shelf overload. It clearly states that exceeding the recommended weight limit can lead to shelf sagging, bracket failure, and potential collapse, creating a safety hazard. The PDF details weight distribution best practices, advising users to evenly distribute items across the shelf surface.

Heavier items should be placed closer to the vertical standards for increased support. The document also suggests avoiding concentrated weight in a single area. It’s crucial to consider the type of items being stored – books and heavier clothing require more robust support than lighter fabrics. Regularly inspect shelves for any signs of stress or bending, and adjust loading accordingly.
Finding ClosetMaid Installation PDFs
Locating the correct closetmaid wire shelving installation instructions PDF is the first step to a successful project. The official ClosetMaid website hosts a comprehensive library of manuals, searchable by system type and year of manufacture. A quick online search using specific keywords like “ClosetMaid installation guide” or “wire shelving PDF” will also yield results, but prioritize the official source for accuracy.
Many home improvement retailers, such as Lowe’s and Home Depot, provide downloadable PDFs directly on their websites for products they carry. These PDFs often include detailed diagrams, parts lists, and step-by-step instructions. Ensure the PDF matches your specific ClosetMaid system to avoid confusion and ensure proper installation.
Locating Official Installation Manuals Online
To find official closetmaid wire shelving installation instructions PDF documents, begin at the ClosetMaid website’s support section. Navigate to their “Resources” or “Downloads” area, often categorized by product line. Utilize the search function, entering your system’s model number for precise results. Alternatively, explore the website’s FAQ section; frequently asked questions often link directly to relevant manuals.

Retailer websites like Lowe’s and Home Depot also host these PDFs within their product pages. Scroll down to the “Resources” or “Downloads” tab. Remember to verify the manual corresponds to your purchased system. Direct links can sometimes be found through online forums or customer support pages, but always confirm authenticity before downloading.
Understanding PDF Document Sections
ClosetMaid wire shelving installation instructions PDF documents typically begin with a parts list, crucial for verifying all components are present; Next, a “Safety Precautions” section outlines essential guidelines to prevent injury and ensure proper installation. Following this, you’ll find detailed step-by-step instructions, often accompanied by illustrative diagrams, covering standard installation, shelf bracket attachment, and accessory additions.
Pay close attention to sections detailing wall type considerations (drywall, plaster, concrete) and appropriate hardware usage. Troubleshooting guides address common issues like uneven walls or bracket instability. Finally, many PDFs include warranty information and contact details for customer support. Thoroughly reviewing each section before starting will streamline the process.
ClosetMaid Customer Support & Testimonials
ClosetMaid provides extensive customer support resources, complementing their wire shelving installation instructions PDF guides. Many users praise the clarity of the PDFs and the readily available online assistance. Testimonials frequently highlight the improved organization and space-saving benefits achieved with their systems.
Customers report positive experiences with ClosetMaid’s responsiveness to inquiries regarding installation challenges, particularly those encountered with uneven walls or specific hardware. Online forums and retailer websites also showcase user-submitted photos and helpful tips. Accessing these resources, alongside the official PDF, empowers installers. Positive feedback consistently emphasizes the system’s durability and customizable nature.