
marie callender frozen pie crust instructions
Marie Callender Frozen Pie Crust Instructions: A Comprehensive Guide
Discover effortless pie-making with Marie Callender’s crusts! This guide provides detailed instructions, from thawing to baking, ensuring a
flaky, golden-brown result every time. Enjoy delicious pies!
Understanding Marie Callender Frozen Pie Crusts
Marie Callender’s frozen pie crusts are a convenient shortcut for both novice and experienced bakers, offering a consistently flaky base for sweet or savory creations. These pre-made crusts eliminate the often-challenging task of making pastry from scratch, saving valuable time in the kitchen. They are crafted to mimic the quality of a homemade crust, utilizing a blend of ingredients designed for tenderness and flavor.
Understanding that these are pre-made, it’s important to recognize they benefit from proper handling and preparation. While offering convenience, they aren’t a ‘one-size-fits-all’ solution; slight adjustments to baking times or techniques may be needed depending on your oven and filling. Knowing the crust’s composition helps anticipate its behavior during baking, leading to a perfect pie.
Types of Marie Callender Frozen Pie Crusts Available
Marie Callender’s primarily offers a standard, deep-dish frozen pie crust, widely available in most grocery stores. This is the most common variety, suitable for a vast range of pie fillings, from classic apple and pumpkin to rich chocolate and savory chicken pot pie. While variations are less frequent, you might occasionally find limited-edition or regional offerings.
Generally, the crusts are sold as a single crust per package, designed for a 9-inch pie plate. They are typically packaged in a foil container for easy removal and baking. It’s important to note that Marie Callender’s doesn’t currently offer gluten-free or alternative crust options, focusing on their traditional, buttery recipe. Always check the packaging for the most up-to-date product information.
Checking the Crust Condition Before Use
Before beginning, inspect the Marie Callender’s frozen pie crust for any damage to the packaging. Ensure the foil container is sealed and there are no punctures or tears that could compromise the crust’s quality. Gently feel the crust through the packaging; it should be firm and consistently frozen, not soft or icy, indicating potential thawing and refreezing.
Upon removing the crust, check for any visible signs of freezer burn – grayish-white patches – which might affect the texture, though the crust remains safe to use. A slight condensation is normal, but excessive ice crystals suggest temperature fluctuations during storage. If the crust appears compromised, it’s best to discard it to guarantee optimal pie-baking results.
Preparing the Crust for Baking
Get ready to bake! Properly thawing, unrolling, and crimping the Marie Callender’s crust are key steps for a beautiful and structurally sound pie;
Thawing Instructions: Room Temperature vs. Refrigerator
Thawing your Marie Callender’s frozen pie crust correctly is crucial for ease of handling and optimal baking results. You have two primary options: room temperature or refrigerator thawing. For room temperature thawing, allow approximately 30-40 minutes. Ensure the crust remains in its original packaging to prevent sticking and maintain freshness.
Alternatively, refrigerator thawing takes considerably longer, typically 2-3 hours. This method is ideal if you’re preparing ahead of time or prefer a slower thaw. Regardless of the method chosen, avoid microwaving the crust, as this can lead to uneven thawing and a compromised texture. The crust should be pliable but still cold to the touch before unrolling.
Unrolling and Positioning the Crust in the Pie Plate
Carefully remove the thawed Marie Callender’s pie crust from its packaging. Gently unroll the crust onto a lightly floured surface. If the crust is sticking, use a spatula to loosen it from the parchment paper. Center the crust and carefully lift it, transferring it to your pie plate.
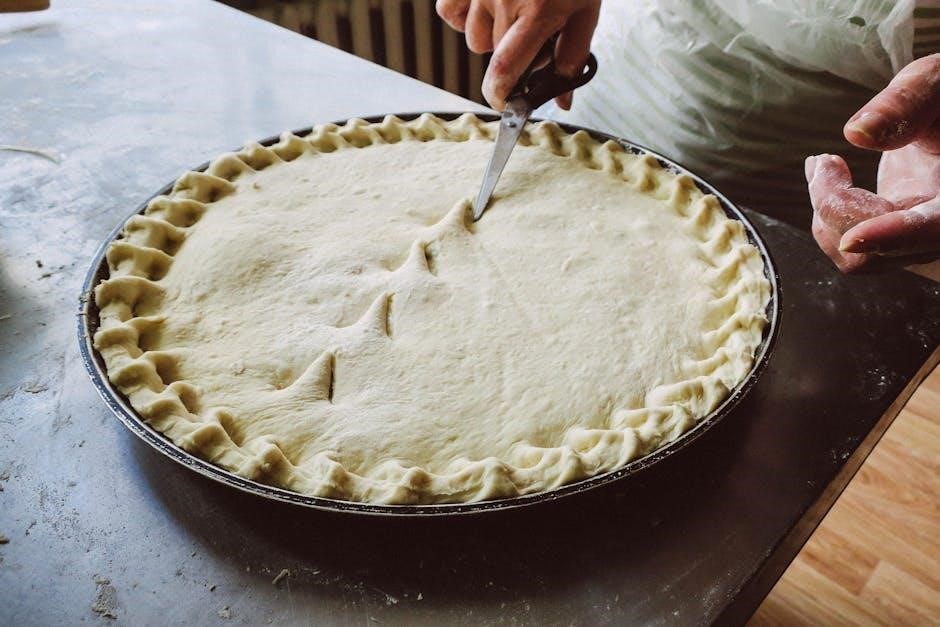
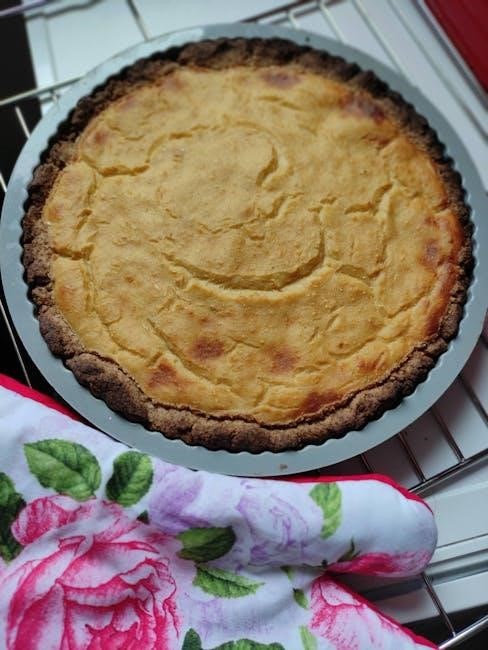
Gently press the crust into the bottom and up the sides of the pie plate, ensuring it fits snugly. Avoid stretching the crust, as this can cause it to shrink during baking. Trim any excess dough around the edges, leaving about an inch overhang for crimping. A slight overlap is preferable to insufficient coverage. Proceed to crimp or flute the edges for a polished look.
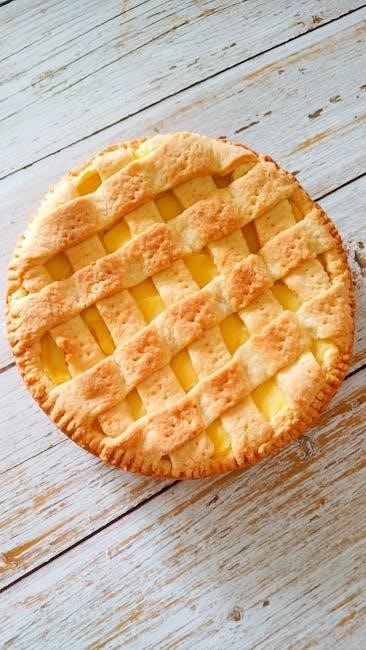
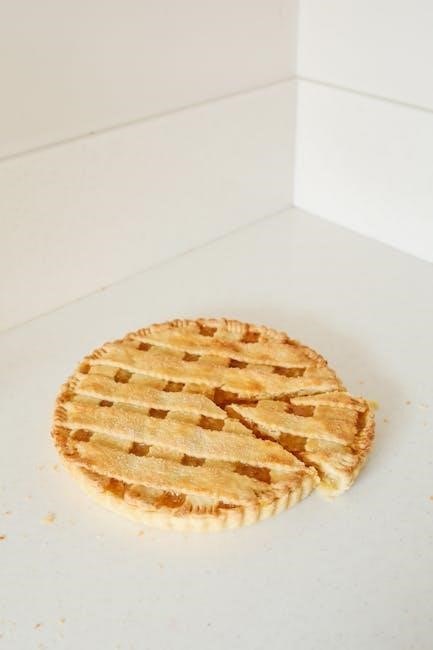
Crimping and Fluting the Edges for a Professional Look
Elevate your pie’s presentation with beautifully crimped or fluted edges! There are several techniques. For a classic crimp, use your fingers to pinch the dough, creating a scalloped pattern around the pie plate’s rim. Alternatively, use a fork to press a decorative design into the overhang.
For a fluted edge, use your thumb and forefinger to gently push the dough inward, creating a wave-like pattern. Consistent pressure is key for a uniform look. Ensure the crimp or flute is secure to prevent the crust from shrinking excessively during baking. A well-defined edge adds a professional touch and enhances the overall appeal of your pie.
Filling Your Marie Callender Pie
Now, unleash your creativity! Whether sweet fruit fillings or savory delights, Marie Callender’s crust complements diverse flavors, promising a truly satisfying pie experience.
Sweet Pie Fillings: Best Options and Considerations
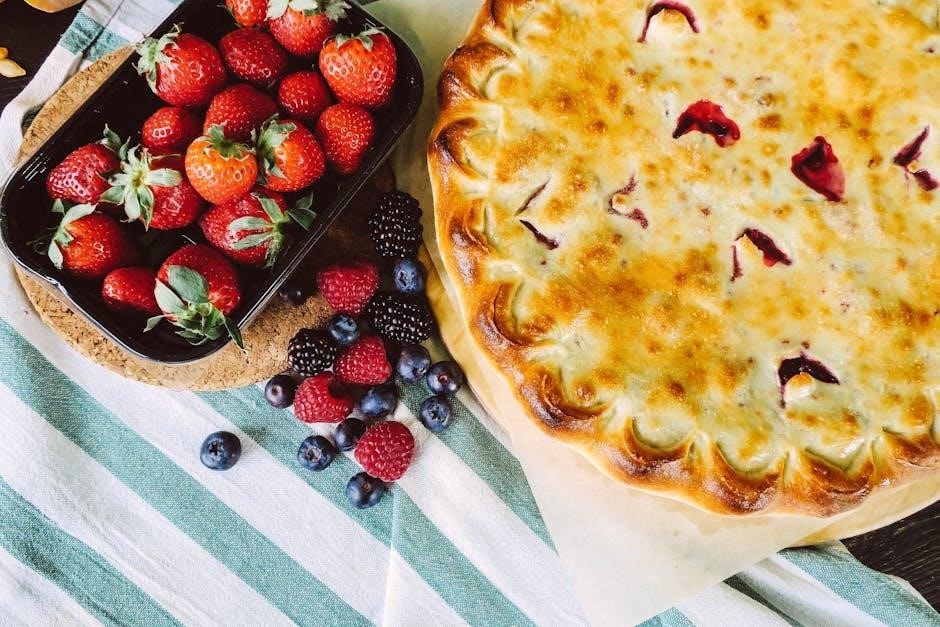
For a delightful sweet pie, consider classic options like apple, cherry, or peach – their natural sweetness pairs beautifully with the flaky Marie Callender crust. Pumpkin and pecan pies are also excellent choices, especially during the fall season. When selecting fillings, remember that fruit fillings benefit from a slight thickening agent, such as cornstarch or tapioca, to prevent a runny pie.
Adjust sugar levels based on the fruit’s sweetness; tart apples require more sugar than ripe peaches. For custard-based fillings, ensure they are cooled before pouring into the crust to avoid melting the butter. Don’t overfill the pie, leaving a little space for bubbling during baking. A sprinkle of cinnamon or nutmeg can enhance the flavor profile of many sweet fillings, creating a warm and inviting aroma.
Savory Pie Fillings: Complementing the Crust’s Flavor
Marie Callender’s crust is remarkably versatile, lending itself wonderfully to savory pies. Chicken pot pie is a classic, with creamy sauce and tender vegetables. Quiche Lorraine, featuring bacon and cheese, offers a sophisticated flavor profile. Shepherd’s pie, topped with mashed potatoes, provides a hearty and comforting meal. Consider fillings with robust flavors to balance the crust’s buttery notes.
Vegetable fillings, like spinach and feta or mushroom and Gruyère, are excellent choices. Ensure fillings aren’t overly wet, as this can lead to a soggy bottom crust. Pre-cooking vegetables can help reduce moisture. Season generously with herbs and spices to enhance the savory experience. A touch of nutmeg or thyme can elevate many savory pie fillings.
Preventing a Soggy Bottom Crust
A soggy bottom crust is a common pie-baking woe, but easily avoidable! Pre-baking, or “blind baking,” the crust is a key strategy, especially for wetter fillings. Brush the bottom crust with a lightly beaten egg white before adding the filling; this creates a moisture barrier. Using a metal pie plate conducts heat more efficiently than glass or ceramic, promoting a crisper crust.
Ensure the oven is fully preheated. Placing the pie on the lowest rack allows for maximum heat exposure to the bottom crust. Consider using a baking stone or steel underneath the pie plate for even more heat distribution. Avoid overfilling the pie, as excess liquid can seep into the crust. Finally, allowing the pie to cool completely before slicing helps the filling set and prevents sogginess.
Baking Instructions & Tips
Achieve pie perfection by following precise baking guidelines! Optimal temperatures and times vary based on filling; always ensure a golden-brown, fully baked crust.
Optimal Oven Temperature for Marie Callender Crusts
Generally, Marie Callender’s frozen pie crusts bake best at a temperature of 375°F (190°C). However, slight adjustments may be necessary depending on your oven and the specific pie filling you are using. For fillings that require a longer baking time, such as custard or pumpkin, initially baking at 425°F (220°C) for the first 15 minutes can help set the crust and prevent a soggy bottom.
After the initial high-heat burst, reduce the temperature to 350°F (175°C) to finish baking. This prevents the crust from becoming overly browned or burnt before the filling is fully cooked. Always monitor the crust closely during baking, and if it begins to brown too quickly, tent it loosely with aluminum foil. Consistent oven temperature is key for even baking and a beautifully golden crust.
Baking Time Guidelines for Different Pie Fillings
Baking times vary significantly based on your pie filling. Fruit pies, like apple or cherry, typically require 50-60 minutes at 375°F (190°C). Custard and cream pies, being more delicate, often need 45-55 minutes, potentially requiring the initial high-heat method mentioned previously. Pumpkin pie generally bakes for around 50-60 minutes.
For savory pies, such as chicken pot pie, baking time can extend to 60-75 minutes, ensuring the filling is thoroughly heated. Always check for doneness by observing the filling – it should be bubbling and the crust golden brown. A knife inserted into the filling should come out clean. Remember these are guidelines; always adjust based on your oven and filling consistency.
Blind Baking the Crust: When and How
Blind baking is crucial for pies with fillings that don’t require extensive baking, like chocolate cream or no-bake cheesecakes. To begin, prick the bottom of the unbaked crust all over with a fork to prevent puffing. Line the crust with parchment paper, then fill with pie weights (dried beans or rice work well).
Bake at 375°F (190°C) for 15-20 minutes, then carefully remove the weights and parchment. Continue baking for another 5-10 minutes, until the crust is lightly golden. This ensures a crisp, stable base. Cool completely before adding your filling. For extra protection against sogginess, brush the baked crust with a thin layer of melted chocolate before filling.
Troubleshooting Common Issues
Solve pie problems easily! From cracking to sogginess and burnt edges, this section offers practical solutions for perfect Marie Callender’s pie crusts every time.
Crust Cracking During Baking: Causes and Solutions
Cracking in your Marie Callender’s pie crust during baking often stems from too little moisture or excessive heat. The crust dries out and becomes brittle, leading to fissures. To prevent this, ensure the oven temperature is accurate and consider reducing it slightly. A common fix is to brush the crust edges with an egg wash or milk before baking, providing added moisture and promoting browning.
Another cause can be overworking the dough during unrolling, developing too much gluten. Handle the crust gently and avoid stretching it excessively; If cracks appear, don’t panic! Small cracks are often cosmetic and won’t affect the pie’s taste. For larger cracks, patching with a small piece of dough and a little water can help mend them before baking is complete.
Soggy Crust: Identifying and Fixing the Problem
A soggy bottom crust is a common pie-baking woe! It usually happens when the filling releases too much liquid, or the crust isn’t adequately sealed. Identifying the cause is key. For fruit pies, tossing the fruit with a bit of cornstarch or tapioca flour helps absorb excess juices. Ensuring a tight seal between the crust and filling is crucial; crimping the edges effectively prevents leakage.
Blind baking the crust – pre-baking it before adding the filling – creates a barrier against moisture. If sogginess occurs despite precautions, try placing the pie on a lower oven rack during the final baking stages to crisp the bottom. A hot baking stone or steel sheet underneath can also help conduct heat and create a flakier, drier crust.
Burnt Crust Edges: Prevention and Recovery
Burnt pie crust edges are easily avoided with a few simple techniques! Protecting the edges during baking is paramount. Pie shields, readily available in kitchen stores, deflect heat, preventing over-browning. Alternatively, you can fashion a DIY shield from aluminum foil. Start checking the pie about 15-20 minutes before the recommended baking time, and rotate it for even cooking.
If edges do burn, carefully trim them off with a sharp knife once cooled. For minor burning, gently brush the affected areas with a little milk or water to soften them. Remember, oven temperatures vary, so adjust baking times accordingly. Lowering the oven temperature slightly can also help prevent excessive browning.
Marie Callender Pie Crust Recipe (Copycat)
Recreate the beloved flavor at home! This copycat recipe uses flour, salt, butter, and water for a flaky, tender crust mirroring Marie Callender’s quality.
Ingredients for a Homemade Version
To faithfully replicate the Marie Callender’s pie crust experience, you’ll need a few key pantry staples. Begin with 2 ½ cups of all-purpose flour, providing the structure for a flaky base. A teaspoon of salt enhances the flavors, while an optional teaspoon of sugar adds a subtle sweetness, particularly suited for fruit pies.
The star of the show is 1 cup (or 2 sticks) of very cold, unsalted butter – crucial for creating those desirable layers. Cold butter doesn’t blend into the flour as easily, resulting in pockets that melt during baking, yielding flakiness. Finally, you’ll require approximately 6-8 tablespoons of ice water. Adding the water gradually is key; you want the dough to just come together, avoiding overmixing which develops gluten and leads to a tough crust.
Step-by-Step Instructions for Making the Crust
First, whisk together the flour, salt, and sugar in a large bowl. Cut in the cold butter using a pastry blender or your fingers until the mixture resembles coarse crumbs. Gradually add the ice water, one tablespoon at a time, mixing lightly after each addition. Stop adding water when the dough just begins to come together.
Form the dough into a disc, wrap it tightly in plastic wrap, and refrigerate for at least 30 minutes. This allows the gluten to relax and the butter to firm up. On a lightly floured surface, roll out the dough to a 12-inch circle. Carefully transfer it to your pie plate, trim the edges, and prepare for filling and baking – a truly rewarding homemade experience!
Achieving Flakiness in a Homemade Crust
For exceptional flakiness, maintain cold ingredients throughout the process. Use very cold butter and ice water – even chilling the flour beforehand helps! Avoid overmixing the dough; it should still have visible pieces of butter. These butter pockets create steam during baking, resulting in those desirable flaky layers.
Don’t overwork the dough when rolling it out. Gentle handling is key. Refrigerating the dough allows the gluten to relax, preventing a tough crust. Finally, baking at a sufficiently high temperature encourages rapid steam production, maximizing flakiness. Mastering these techniques will yield a crust rivaling Marie Callender’s, offering a delightful texture with every bite!
Storage and Handling
Proper storage keeps crusts fresh! Freeze unused portions tightly wrapped. Marie Callender’s crusts have a shelf life; re-freezing thawed crusts isn’t recommended for quality.
Freezing Unused Portions of the Crust
If you only need half a pie crust, or wish to save the other for a future baking adventure, freezing is a viable option, but requires careful preparation to maintain quality. To freeze, ensure the unused portion of the Marie Callender frozen pie crust is tightly wrapped. Begin by wrapping it securely in plastic wrap, pressing out any excess air to prevent freezer burn.
Following the plastic wrap, place the wrapped crust inside a freezer-safe bag or container. This double layer of protection is crucial for preventing moisture loss and maintaining the crust’s texture. Properly frozen, the crust can be stored for up to two months, though best quality is achieved when used sooner. Remember to label the package with the date for easy tracking!
Shelf Life of Marie Callender Frozen Pie Crusts
Understanding the shelf life of Marie Callender frozen pie crusts is essential for ensuring optimal baking results and food safety. When stored continuously frozen at 0°F (-18°C) or lower, these crusts generally maintain their best quality for approximately 12 months. However, they technically remain safe to use beyond this timeframe, though texture and flavor may begin to degrade.
Always check for signs of freezer burn, such as discoloration or ice crystals, which indicate a loss of quality. It’s crucial to adhere to the “use-by” date printed on the packaging as a guideline. Proper storage – keeping the crust tightly sealed in its original packaging – significantly extends its usability. Discard any crust exhibiting unusual odors or textures.
Re-freezing Thawed Crusts: Is it Safe?
Generally, re-freezing a thawed Marie Callender pie crust is not recommended for optimal quality. The thawing and refreezing process can compromise the delicate layers of the pastry, resulting in a tougher, less flaky crust. However, if the crust has only been thawed in the refrigerator and remains cold – below 40°F (4°C) – it may be refrozen, though a noticeable texture change is likely.
For best results, use the thawed crust immediately or bake the pie. If you must refreeze, wrap it tightly in plastic wrap, then in foil, to minimize freezer burn. Be aware that repeated thawing and freezing will significantly degrade the crust’s quality, impacting the final pie’s texture and taste. Prioritize using fresh or properly thawed crusts.