
chefman espresso machine manual
Chefman Espresso Machine Manual: A Comprehensive Guide
Welcome! This detailed manual guides you through all aspects of your Chefman 6-in-1 Espresso Machine (RJ54).
It covers setup, brewing, cleaning, and troubleshooting, ensuring delicious espresso every time.
Congratulations on purchasing the Chefman 6-in-1 Espresso Machine! This versatile appliance, model RJ54, is designed to bring café-quality coffee into your home. This machine isn’t just limited to espresso; it offers six functions in one compact unit, providing flexibility for various coffee preferences.
The Chefman 6-in-1 is a multi-functional system capable of brewing espresso, cappuccino, latte, and more. It features a built-in milk frother, allowing you to create creamy, textured milk for specialty drinks. The user manual, available as a PDF (80143267_6-in-1-espresso-machine.pdf, 692.06 KB), provides comprehensive instructions for optimal use.
This guide will walk you through each step, from initial setup and priming to advanced techniques like adjusting grind size and frothing milk. Whether you’re a seasoned barista or a beginner, this manual will empower you to master the art of espresso making with your new Chefman machine. Product registration is also available for added benefits.
Understanding the Components
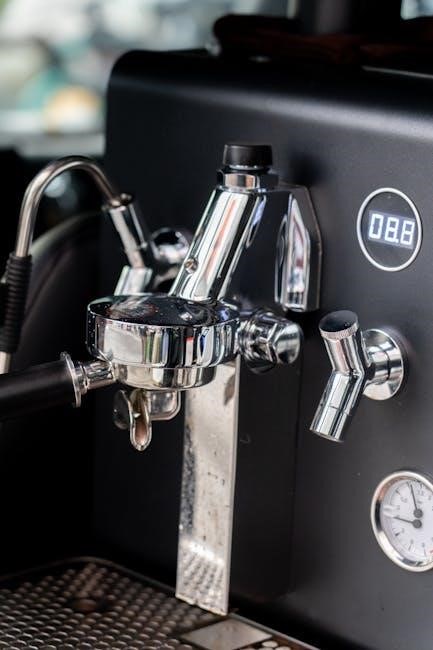
Your Chefman 6-in-1 Espresso Machine (RJ54) consists of several key components working in harmony. These include the water reservoir, which provides water for brewing, and the filter basket holder, securing the coffee grounds during extraction. Different filter basket types are available for single or double shots.
The portafilter is the handle with the filter basket, attaching to the machine for brewing. The steam wand is crucial for frothing milk, creating the perfect texture for cappuccinos and lattes. The drip tray catches any spills, maintaining a clean workspace. The machine’s control panel features intuitive buttons for power, brewing, and frothing.

Familiarizing yourself with these parts, as detailed in the user manual, is essential for proper operation and maintenance. The manual (PDF available) provides diagrams and explanations of each component. Understanding how these elements interact will ensure you can efficiently operate and care for your Chefman espresso machine, maximizing its lifespan and performance.
Initial Setup and Priming
Before your first delicious espresso, proper initial setup and priming are essential. Begin by removing all packaging materials and ensuring the machine is placed on a stable, level surface; Fill the water reservoir with fresh, filtered water – avoid exceeding the maximum fill line.
Priming removes air from the system, ensuring optimal brewing temperature and pressure. Insert the portafilter without coffee grounds. Select the brewing function and allow the machine to run for approximately 30-60 seconds. This will flush water through the system. Repeat this process 2-3 times.
Refer to your user manual (RJ54 model) for specific priming instructions. This initial flush may produce some noise – this is normal. Proper priming is crucial for preventing damage and guaranteeing the best possible espresso quality. Discard the water used during priming before proceeding to the first-time use instructions.
First-Time Use Instructions
Now that your Chefman espresso machine is primed, you’re ready for the first brew! Begin by ensuring the water reservoir is adequately filled with fresh, filtered water. Select the appropriate filter basket for your desired coffee amount – single or double shot.
Add finely ground espresso coffee to the chosen filter basket. Gently level the grounds, but do not tamp at this stage. Securely lock the portafilter into the brew head. Place a cup or mug beneath the spout.
Turn on the machine and select your desired brewing function. Allow the machine to run its cycle. The first brew may contain residual water from the priming process; this is normal; Discard this initial shot. Your Chefman espresso machine is now ready to consistently deliver rich, flavorful espresso!
Brewing Espresso
To brew exceptional espresso, begin by ensuring your machine is properly warmed up. Select either the single or double shot filter basket, depending on your preference. Add finely ground espresso, and firmly tamp the grounds to create a consistent puck. This is crucial for even extraction.
Securely attach the portafilter to the brew head. Place your espresso cup beneath the spout. Initiate the brewing process by selecting your desired shot volume. Observe the extraction – a rich, reddish-brown stream indicates a proper brew.
A blonde, watery stream suggests under-extraction, while a dark, sputtering stream indicates over-extraction. Adjust your grind size and tamping pressure accordingly. Experiment to find the perfect balance for your taste. Enjoy your freshly brewed espresso!
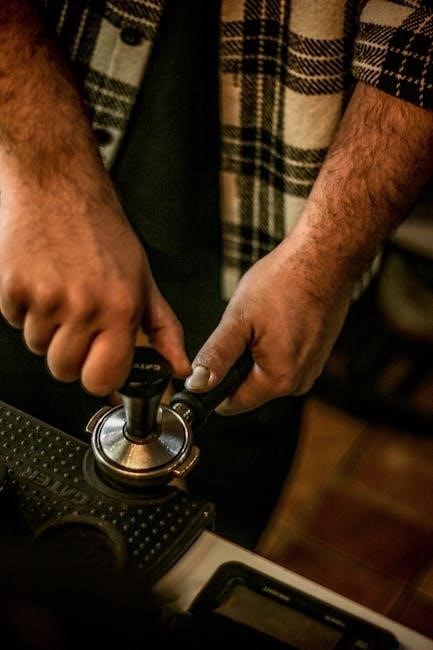
Grind Size and Tamping
Achieving the perfect espresso relies heavily on grind size and tamping technique. A fine grind is essential for proper extraction, but too fine can cause clogging. Start with a fine grind and adjust as needed based on your brew results. If the espresso flows too quickly, grind finer. If it drips slowly or not at all, grind coarser.
Tamping compresses the coffee grounds into a uniform puck, offering resistance to the water pressure. Apply approximately 30 pounds of pressure, ensuring a level and consistent tamp. An uneven tamp leads to channeling, resulting in uneven extraction and a bitter taste.
Use a tamper that fits your portafilter basket snugly. Practice makes perfect – consistent tamping is key to repeatable, high-quality espresso.
Adjusting Espresso Volume
Your Chefman espresso machine allows you to customize the espresso volume to your preference. The volume is controlled during the brewing process, typically by interrupting the water flow. Observe the espresso as it extracts; a standard shot is around 1-2 ounces (30-60ml).
To adjust the volume, start the brewing cycle and manually stop it when you’ve reached your desired amount. Pay attention to the extraction time – ideally, a shot should extract in 25-30 seconds. If the volume is too small, allow the machine to run longer. If it’s too large, stop it sooner.
Experimentation is key! Different coffee beans and grind sizes will require slight adjustments to achieve optimal results. Consistent volume ensures a consistent flavor profile in your espresso-based drinks.
Making Cappuccino and Latte
Once you’ve mastered brewing espresso, creating cappuccinos and lattes is straightforward! A cappuccino traditionally consists of equal parts espresso, steamed milk, and foamed milk. Begin with a shot of espresso, then add steamed milk, and finish with a generous layer of fluffy milk foam.
A latte, on the other hand, features more steamed milk and a thinner layer of foam. Start with espresso, pour in a larger quantity of steamed milk, and top with a small amount of foam. The ratio is typically one part espresso to three parts steamed milk.
The key to both drinks lies in the quality of the steamed and frothed milk – utilize the machine’s milk frother for best results. Experiment with different milk types to discover your preferred texture and sweetness!
Using the Milk Frother
The Chefman espresso machine features an integrated milk frother, essential for crafting lattes and cappuccinos. Ensure the frothing pitcher is clean and dry before use. Fill it with the desired amount of milk – do not exceed the maximum fill line indicated on the pitcher.
Position the frother wand just below the surface of the milk. Turn on the frother and slowly lower the pitcher to introduce air, creating foam. Once the milk volume increases, submerge the wand deeper to heat and create a velvety texture.
Be mindful not to overheat the milk; aim for a temperature between 140-160°F (60-70°C). After frothing, gently tap the pitcher on the counter to release any large bubbles and swirl to create a consistent microfoam. Clean the frother wand immediately after each use to prevent milk residue buildup.
Frothing Techniques for Different Milk Types

Achieving optimal foam varies with milk type. Whole milk creates the richest, most stable foam due to its higher fat content; introduce air early and submerge the wand for heating. 2% milk froths well but may require slightly more air introduction.
Skim milk can be challenging; use a cold pitcher and introduce air aggressively, but be careful not to over-froth. Plant-based milks, like almond, soy, or oat, require specific techniques. Oat milk generally froths the best, similar to 2% milk. Almond milk needs a higher air introduction and may produce a less stable foam.
Soy milk can be prone to overheating, so monitor the temperature closely. Experiment with different techniques to find what works best for your preferred milk. Always purge the steam wand before and after frothing to ensure optimal performance and cleanliness.
Cleaning and Maintenance
Regular cleaning is crucial for optimal performance and longevity. After each use, wipe down the exterior with a damp cloth; Remove and rinse the portafilter, filter basket, and drip tray. Empty the used coffee grounds promptly. The milk frothing wand should be purged and wiped immediately after each use to prevent milk buildup.
Weekly, thoroughly clean the water reservoir and removable parts with warm, soapy water. Inspect the shower screen for any blockages and clean as needed. Monthly, backflush the machine (refer to the descaling section for instructions). Avoid abrasive cleaners, as they can damage the machine’s finish.
Proper maintenance ensures consistently delicious espresso. Ignoring cleaning can lead to decreased performance, altered coffee flavor, and potential machine failure. Always unplug the machine before cleaning and ensure all parts are dry before reassembly.
Descaling the Machine
Descaling removes mineral buildup that affects performance and coffee taste. Use a commercially available descaling solution specifically designed for espresso machines, or a mixture of white vinegar and water (follow solution instructions). Fill the water reservoir with the descaling solution.
Run a full brewing cycle without coffee grounds. Repeat this process several times, then run several cycles with fresh water to thoroughly rinse the system. Backflushing with descaling solution is also recommended – run a backflush cycle as you would with water, then rinse thoroughly.
Frequency depends on water hardness; typically every 3-6 months. Ignoring descaling leads to reduced water flow, increased brewing time, and potential damage. Always consult the descaling solution’s instructions and ensure complete rinsing to avoid residual taste.
Troubleshooting Common Issues
Issue: No water flow. Solution: Check water reservoir level, ensure the machine is properly primed, and verify the filter basket isn’t clogged. Issue: Weak espresso. Solution: Increase coffee grounds, tamp firmly, or select a finer grind size.

Issue: Espresso is too bitter. Solution: Reduce coffee grounds, use a coarser grind, or shorten the brewing time. Issue: Machine makes unusual noises. Solution: Ensure proper water levels and descaling is up to date.
Issue: Error codes appear. Solution: Refer to the ‘Error Codes and Solutions’ section for specific guidance. If problems persist, contact customer support. Always unplug the machine before attempting any internal troubleshooting or cleaning beyond routine maintenance.
Error Codes and Solutions
Error Code E1: Low water level – Refill the water reservoir and restart the machine. Error Code E2: Overheating – Allow the machine to cool down for at least 30 minutes before attempting to use it again.
Error Code E3: Pump failure – Contact customer support for assistance, as this may require professional repair. Error Code E4: Filter basket issue – Ensure the filter basket is correctly inserted and not blocked. Clean the basket thoroughly.
Error Code E5: Descaling needed – Initiate the descaling process as outlined in the ‘Descaling the Machine’ section. Ignoring error codes can lead to further damage. Always consult this guide before attempting repairs. If an error persists after following these steps, contact Chefman support for further assistance.
Water Reservoir Management
Maintaining your Chefman espresso machine’s water reservoir is crucial for optimal performance and longevity. Always use fresh, filtered water to prevent mineral buildup. The reservoir is easily removable for filling and cleaning. Do not overfill beyond the ‘MAX’ line indicated on the tank;
Regularly clean the reservoir with mild detergent and warm water, ensuring all residue is removed. Avoid abrasive cleaners, as they can damage the plastic. Inspect the reservoir for cracks or leaks before each use. A properly maintained reservoir ensures consistent water temperature and prevents scaling, contributing to the flavor of your espresso.
Empty and clean the reservoir if the machine will not be used for an extended period. Proper water management is key to a long-lasting, high-quality espresso experience.
Filter Basket Types and Usage
Your Chefman espresso machine includes multiple filter baskets to accommodate different coffee preferences. Typically, you’ll find a single-shot basket and a double-shot basket. The single-shot basket is designed for brewing a single espresso, while the double-shot basket yields a larger volume – ideal for lattes or cappuccinos.
Ensure the correct basket is securely placed in the portafilter before adding coffee grounds. Use the appropriate amount of coffee for each basket size; generally, around 7-8 grams for single-shot and 14-16 grams for double-shot. Press the clip with your thumb to hold the basket in place when emptying used grounds.
Experiment with different basket types to find your preferred espresso strength and volume. Proper basket selection and coffee dosage are essential for achieving optimal extraction and a delicious espresso.
Safety Precautions
Always prioritize safety when operating your Chefman espresso machine. Never immerse the machine, cord, or plug in water or other liquids to prevent electric shock. Ensure the machine is unplugged before cleaning or performing maintenance. Hot surfaces, like the portafilter and steam wand, can cause burns – use caution and allow them to cool before handling.

Do not operate the machine with a damaged cord or plug. If the machine malfunctions, immediately unplug it and contact customer support. Keep the machine out of reach of children. Avoid touching hot components during and immediately after use. Never attempt to disassemble or repair the machine yourself.
Always operate the machine on a stable, level surface. Be mindful of steam pressure when using the milk frother. Follow all instructions carefully to ensure safe and enjoyable operation;

Warranty Information
Chefman stands behind the quality of its products. Your 6-in-1 Espresso Machine is warranted against defects in materials and workmanship for a period of one year from the date of original purchase; This warranty covers normal household use and does not cover damage resulting from misuse, abuse, accidents, or unauthorized repairs.
To make a warranty claim, please retain your proof of purchase and contact Chefman customer support. We will, at our discretion, repair or replace the defective product. This warranty gives you specific legal rights, and you may have other rights which vary from state to state.
Please note that this warranty is void if the machine has been modified or altered in any way. For complete warranty details and to register your product, visit our website or contact customer service. Product registration helps us provide better support and updates.
Product Registration Details
Registering your Chefman 6-in-1 Espresso Machine offers several benefits, including access to exclusive updates, promotions, and faster customer support. Registration confirms your ownership and allows us to notify you of important product information, such as software updates or safety recalls.
You can register your appliance easily online through the Chefman website. Locate the “Product Registration” section and follow the simple instructions. You will need your model number (RJ54), the date of purchase, and your contact information. Alternatively, you may find a registration card included within the product packaging;
Keeping your product registered ensures we can assist you efficiently should you encounter any issues. It also allows us to improve our products based on customer feedback. Don’t delay – register your Chefman Espresso Machine today for a seamless ownership experience!
Frequently Asked Questions (FAQ)
Q: My espresso is weak. What could be the problem? A: Ensure you’re using the correct grind size and tamping firmly. Insufficient coffee grounds or a loose tamp can result in weak espresso. Also, verify the water temperature is optimal.
Q: How often should I descale the machine? A: Descale every 3-6 months, depending on water hardness. Regular descaling prevents mineral buildup and maintains optimal performance. Use a descaling solution specifically designed for espresso machines.
Q: Can I use pre-ground coffee? A: While possible, freshly ground beans are recommended for the best flavor. If using pre-ground, select a fine grind suitable for espresso.
Q: The milk frother isn’t working. What should I do? A: Ensure the frother is clean and properly assembled. Check the steam wand for blockages. Refer to the ‘Using the Milk Frother’ section for detailed instructions.